Follow this Pikmin 3 Deluxe Day 2 walkthrough to discover Rock Pikmin, rescue Brittany, and collect four essential fruits in the Garden of Hope.
Walkthrough
- 1Summon your Red Pikmin and collect nearby pellets. Break down the nearby wall.
- 2Collect the two piles of bridge pieces. The left pile is guarded by a small bulborb; defeat it by lobbing a Pikmin at its back.
- 3Cross the bridge and face your first Bulborb. Aim for its eyes to make it flinch, and throw Pikmin onto its back for continuous damage.
- 4After defeating the Bulborb, proceed to the wall and break it down.
- 5Continue past the wall to find Brittany and the first fruit, a Sunseed Berry.
- 6Send three Pikmin to the Strawberry and enter the nearby cave.
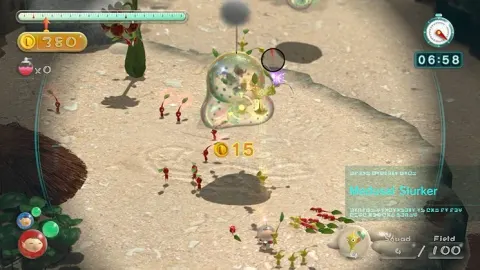
- 7Inside, you'll encounter a Medusal Slurker. Throw a Pikmin onto it, then whistle it back. Once it shakes, attack with your entire group.
- 8After defeating the Slurker, you'll find Rock Pikmin. Investigate their ability to break crystals by smashing ornaments in the cave and collecting the black pellets.
- 9Once you have twenty Rock Pikmin, return outside. Use them to break the glass wall near the Strawberry.
- 10Hug the left wall and use Rock Pikmin to free Brittany from her crystal prison. This will trigger a tutorial on using multiple captains and yield your second fruit, a Lemon.
- 11Head deeper into the area. Use Rock Pikmin to attack the Face Wrinklers by throwing them onto their heads.
- 12Construct the bridge: one pile of parts is to the right, the other is up the left ramp inside a crystal.
- 13Build the bridge, then claim the Strawberry from the left ramp.
- 14Cross the bridge back to the onion. Use your Rock Pikmin to destroy the crystal wall behind the onion.
- 15Head through the crystal wall and encounter the Fiery Blowhog. Use your fire-resistant Red Pikmin to defeat it.
- 16Look left for taped crosses. Throw a Captain over and send them a contingent of Red and Rock Pikmin. Swap to that Captain and destroy the wall/build the bridge.
- 17Return your first Captain to the onion to gather any idle Pikmin.
- 18For the remainder of the day, you can choose to fight the Armored Mawdad or harvest more Pikmin. This guide recommends harvesting.
- 19Head left to encounter Yellow Wollyhops. Use Rock Pikmin to attack them, as they cannot be squished.
- 20After dealing with the Wollyhops, demolish the clay wall to the right with your squad.
- 21Inside, solve a weight puzzle to get fruit: throw Pikmin onto one tin to weigh it down, then add your Captain.
- 22Throw enough Pikmin onto the other tin to weigh it down, allowing your Captain to stand on bricks.
- 23Call Pikmin from your tin and throw them up to the Zest Bomb (Lime).
- 24As the day ends, ensure all Pikmin are safely in your squad by whistling them to your side.
Tips
- Each day lasts 13 minutes and requires fruit collection for juice to survive.
- Pikmin only need to be in your squad to be safe at the end of the day.
- Rock Pikmin are effective against crystals, crystal walls, and enemies like Yellow Wollyhops.
- Red Pikmin are resistant to fire and useful against the Fiery Blowhog.
- Four pieces of Fruit: Sunseed Berry, Lemon, Sunseed Berry, Zest Bomb (Lime).
- Discovery of Rock Pikmin.
- Rescue of Brittany.
100% Human-Written. AI Fact-Checked. Community Verified. Learn how AntMag verifies content