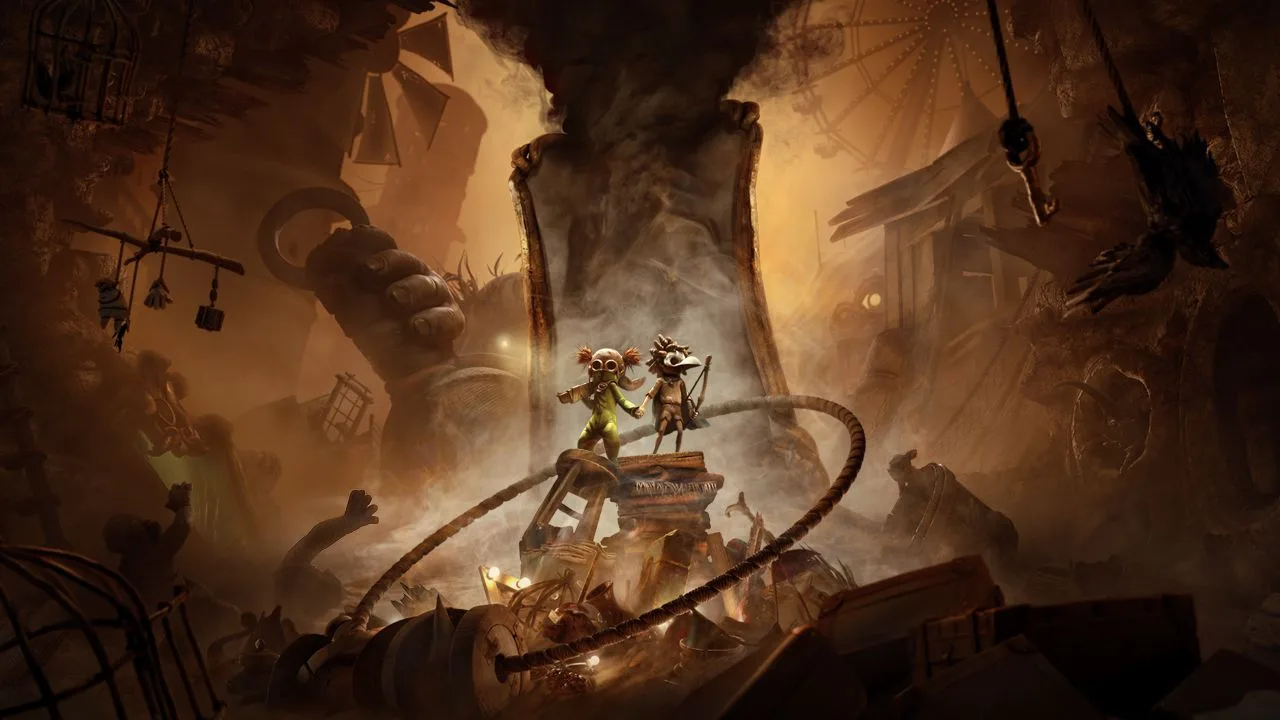
Get ready to face your fears in Little Nightmares III, the latest installment in the atmospheric puzzle-platformer series. Developed by Supermassive Games, this co-op adventure plunges you into the chilling world of the Nowhere alongside Low & Alone. Together, you’ll navigate through disturbing locations like the Spiral, mastering stealth and solving intricate puzzles to overcome monstrous foes and escape the terrifying delusions that lurk in the shadows.
This guide is your essential companion for surviving the Nowhere. We’ll walk you through every step of Low & Alone's journey, from the Necropolis to the Institute, ensuring you find every collectible for 100% completion. Plus, we've got you covered with a dedicated section to help you snag all those tricky Steam Achievements.
Little Nightmares - FAQ/Walkthrough
Need help with Little Nightmares III? This FAQ/Walkthrough guide provides step-by-step instructions to help you complete the game 100%, find all collectibles, and unlock achievements.
Hey there! So you've picked up Little Nightmares III and are looking for a hand, huh? You've come to the right place. This guide is designed to be your trusty companion, helping you navigate the creepy world and overcome its challenges. Think of me as that friend who's already played through and is showing you the ropes, pointing out all the hidden stuff and making sure you don't miss out on anything important.
My goal here is to help you achieve a full 100% completion. That means we'll be going through the story together, I'll be showing you where to find all those sneaky Nomes and hidden Statues, and we'll make sure you snag any missable trophies or achievements along the way. I've tried to keep spoilers to a minimum, so you'll get the guidance you need without having the whole story spoiled for you. It's designed to help you play, not play it for you!
If you ever get stuck, find a mistake, or think something could be clearer, don't hesitate to reach out. Your feedback helps make these guides better for everyone.
A Little Support Goes a Long Way
Writing these guides takes a ton of time and effort, all done because I love helping players like you. If you've found this walkthrough useful and want to help me keep creating these comprehensive guides, consider sending a donation my way. You can send a gift via Paypal or an Amazon Gift Card to krystalnexus(at)yahoo(dot)com. Even just an email saying thanks is super appreciated!
Ready to dive in? Let's get started with the gameplay.
Guide and Walkthrough (PS4) by Krystal109
Complete Little Nightmares III walkthrough and guide, including Chapter 1: The Prison and collectibles.
- 1Begin your journey in Chapter 1: The Prison.
- 2Progress through Chapter 2: The Lair.
- 3Navigate the challenges of Chapter 3: The Kitchen.
- 4Explore the dangers of Chapter 4: The Guest Area.
- 5Conclude your main story in Chapter 5: The Lady's Quarters.
- 6For those seeking more, delve into the Secrets of the Maw expansion:
- 7Start with Chapter 1: The Depths.
- 8Continue in Chapter 2: The Hideaway.
- 9Finish the expansion in Chapter 3: The Residence.
Collectibles:
- Find all collectibles within The Prison.
- Locate all secrets in The Lair.
- Discover everything in The Kitchen.
- Uncover all items in The Guest Area.
- Gather all secrets in The Lady's Quarters.
- For Secrets of the Maw, find collectibles in:
- The Depths.
- The Hideaway.
- The Residence.
Other Sections:
- Learn the Controls and Basics of gameplay.
- Discover all Trophies & Achievements.
- View Contact Information and Version History.
Controls
Learn the controls for Little Nightmares III on PlayStation 4 and Xbox One, including movement, lighter, and grab.
PlayStation 4 Controls:
- Move Character: Left Analog Stick
- Move Camera: Right Analog Stick
- Jump/Throw: X Button
- Lighter: R2 Button
- Sprint (Hold): L2 Button
- Crouch/Slide: Circle Button
- Grab: R1 Button
- Pause Menu: Options Button
Xbox One Controls:
- Move Character: Left Analog Stick
- Move Camera: Right Analog Stick
- Jump/Throw: A Button
- Lighter: RT Button
- Sprint (Hold): LT Button
- Crouch/Slide: B Button
- Grab: RB Button
- Pause Menu: Menu Button
- Holding the Sprint button (L2 on PS4, LT on Xbox One) allows you to move faster.
- Use the Crouch/Slide button (Circle on PS4, B on Xbox One) to get under obstacles or evade enemies.
- The Lighter is essential for illuminating dark areas and scaring away certain threats.
Basics
New to Little Nightmares III? This guide breaks down movement, using your lighter, throwing objects, and finding collectibles. Get started safely!
Hey there! So you're diving into the creepy world of Little Nightmares III, huh? It's a fantastic game, but it can be a bit tricky to figure out at first since it doesn't hold your hand with a lot of tutorials. Don't worry, though! I'm here to walk you through the absolute basics so you can navigate Six's (or your character's!) world like a pro and stay safe while you're at it.
Let's get you up to speed on how to move, use your trusty lighter, interact with the environment, and maybe even find some hidden goodies.
Movement: Running, Jumping, and Climbing
You'll be doing a lot more than just walking around. Sometimes, you'll hit obstacles that seem impossible to get over. That's where running, jumping, and climbing come in clutch!
The most fundamental move is jumping and climbing. When you're near something you can climb, press the [Jump/Climb Button]. Six should automatically grab the ledge and pull herself up. If an object is a bit too high, don't worry. Just jump towards the ledge you want to reach and keep holding the [Jump/Climb Button]. This will make her grab on, and then you can pull her up.
Now, what if you're spotted by one of the Maw's less-friendly residents and there's nowhere to hide? Hold down the [Sprint Button]. This lets you bolt away from danger until you find a safe spot or manage to escape. Just a heads-up, though: sprinting isn't always the best move. Sometimes it's better to try and sneak or find a hiding spot first.
The Lighter: Your Beacon in the Dark
From the get-go, you'll notice the Maw is seriously dark and gloomy. Usually, if an area is brightly lit, it means one of the Maw's inhabitants is nearby – definitely not a good sign! Luckily, you start with a lighter. You can use it to light up dark areas or to ignite things like lanterns and candles.
To use your lighter, just press the [Lighter Button]. This will illuminate your surroundings. Keep in mind that while the lighter is out, you won't be able to hold other objects. So, choose your moments wisely!
Throwing Objects: Puzzles and Distractions
A big part of Little Nightmares is figuring out puzzles and avoiding the creepy inhabitants. You'll often need to distract enemies or activate switches by using objects in the environment. Grab a light item, like a toy or a shoe, by pressing the [Grab Button], and then throw it using the [Throw Button]. This is super useful when you feel stuck or can't find a safe path past an enemy.
Collectibles: Nomes and Statues
There are two main types of collectibles you'll be looking for:
- Nomes: These are little gnome-like creatures. They're really shy and will run from you at first, but if you can find them again, you can give them a hug. Once you do, they'll follow you for a bit, and you'll get credit towards certain trophies or achievements.
- Statues: These are geisha statues that look a bit like the Maw's owner. You can smash them by picking them up and throwing them. If you manage to break all 10 statues scattered throughout the game, you'll unlock the Geisha Mask for your character and earn a special trophy or achievement.
Keep these basics in mind, and you'll be navigating the Maw much more confidently. Happy (and safe) gaming!
Similar guides you might like


100% Human-Written. AI Fact-Checked. Community Verified. Learn how AntMag verifies content