
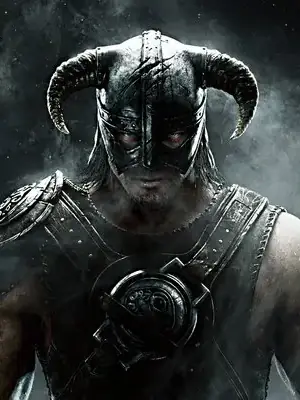
Welcome to Final Fantasy I, the game that started it all! As one of the Warriors of Light, you’ll embark on an epic quest to defeat the four fiends and restore balance to a world shrouded in darkness. This classic RPG challenges you to choose your party, level up your characters, and explore a vast world filled with dungeons, towns, and powerful monsters. It’s a journey of discovery, where every victory brings you closer to saving the world.
This guide is your companion through that journey. We’ll cover everything you need to know, from making those crucial early-game decisions and efficiently leveling your party to navigating the treacherous dungeons like the Marsh Cave and mastering combat against formidable foes. Whether you’re aiming to defeat the Chaos or simply want to explore every corner of the world, this guide provides the insights and strategies to help you succeed.
Part 1
Begin your quest in Final Fantasy I with Part 1 of our comprehensive guide. Learn about game basics, controls, and the initial steps in Cornelia.
This guide is written and compiled by sephirosuy / Seph. You may not copy or reproduce any part of it under any circumstances except for personal, private use. It may not be placed on any web site or otherwise distributed publicly without advance written permission. Use of the guide on any other web site or as a part of any public display is strictly prohibited, and a violation of copyright. Please ask for permission by contacting me first before using this document for any reason, probably I have no problem of giving permission as long as you give me proper credit and not editing the guide, that's easy enough.
This document is a FAQ/Walkthrough written for Final Fantasy on iPhone/iPod Touch that was released on 2/25/2010.
Updates history: - 04/05/10 - Full Bestiary, updates of Secrets section - 03/23/10 - Full walkthrough, Secrets, Shop List done
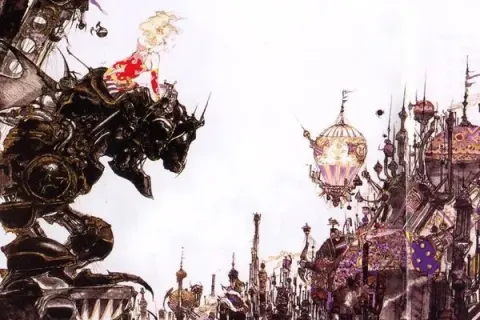
About the game: Initially released in Japan in 1987, the original FINAL FANTASY amazed audiences with its rich story and stunning graphics. Players guide the Warriors of Light as they set out on a quest to restore the crystals to their former luster. Its side view battles, choice and promotion of character classes, and sprawling world explored with fantastic vehicles quickly became standards of the series. This game set the stage for all FINAL FANTASY games to come. This edition also contains the bonus dungeons added to later editions of the game--the Soul of Chaos and the Labyrinth of Time.
Game Basic
CONTROLS
Move Character - Tap the direction pad (bottom left)
Party Menu - Tap the status box (bottom right)
World Map - Tap and hold the status box (bottom right)
STATUS
Strength - Effectiveness of physical attack
Agility - Accuracy and Evasion rate
Intelligence - Effectiveness of magic attack
Stamina - Increament rate of character's HP
Luck - Chance of critical hits
Attack - Power of physical attack
Accuracy - Chance of getting more hit in each physical attack
Defense - Defense power
Evasion - Chance of evading an attack from enemies
FORMATION
1st slot - 50% chance of being hit
2nd slot - 25% chance of being hit
3rd slot - 12.5% chance of being hit
4th slot - 12.5% chance of being hit
Walkthrough
Cornelia - Chaos Shrine
Game Start
~Setup your team and name your characters. Personally, I simply create the default team given by the game (Warrior, Thief, White Mage, Black Mage).
Cornelia
~Begin at the Cornelia town area. Left part of the town is shops, inn, and church (to revive your ally if KO'd) if you wish to look around. Enter the rig
Part 2
Complete walkthrough for Final Fantasy I Part 2, covering Chaos Shrine, Cornelia, Pravoka, Elfheim, Marsh Cave, Western Keep, Motoya's Cave, and Mystic Treasures.
- 1After the scene with the king in Cornelia, leave the town and purchase necessary magics for your mages.
- 2On the World Map, train around the town, utilizing the inn for healing.
- 3Make your way North-West, passing the Earthgift Shrine, to reach the Chaos Shrine.
- 4Chaos Shrine:
- 5The room straight up from the entrance leads to the boss.
- 6Go to the South-West room for a Leather Cap.
- 7Go to the North-West room for a Potion and a Tent.
- 8The North-East room is locked and requires the Mystic Key (obtained later).
- 9Return to the first room near the entrance for the boss battle.
- 10BOSS: Garland (HP: 212): A straightforward battle. Attack until your HP is low, then heal with Cure or a Potion. Use the Black Mage's Thunder or Fire spells to end the fight quickly.
- 11After defeating Garland, you return to the castle. Talk to Princess Sarah to obtain the Lute. Heal your party at the inn if needed.
- 12Head North from Cornelia to trigger a scene at the bridge.
- 13After crossing the bridge, take the right path East until it leads South to Pravoka town.
- 14Pravoka:
- 15Check the shops for new items. Update your inventory if possible. Purchase Blizzard and Temper for your Black Mage, and some Antidotes.
- 16Move left and talk to the pirates. Defeat them all to obtain their ship.
- 17Leave the town and enter the ship at the dock.
- 18From the dock near Pravoka, sail West until you reach Cornelia. (If you haven't already, buy Dia magic for your White Mage here).
- 19Head straight South from Cornelia to reach Elven Castle.
- 20Elfheim/Elven Castle:
- 21Enter the village outside the castle, Elfheim. You can find more items in the shop, though they may be costly.
- 22Go to the castle and head up to the room with the sleeping prince. Talk to the Healer beside him.
- 23From Elfheim, move West, pass the mountains, and turn North to reach Western Keep. You can visit the King inside, who will ask for the Crown (this step can be skipped).
- 24Go South from Western Keep to reach Marsh Cave.
- 25Marsh Cave:
- 26Take the North path to B2F.
- 27Head to the top right room for a Dagger.
- 28Go to the left room for 680 Gil.
- 29The bottom room contains a Broadsword and 620 Gil.
- 30Return to the cave entrance and follow the South path to find a ladder leading to another part of B2.
- 31On B2, go to the bottom right to reach B3F.
- 32On B3, find a room containing a Phoenix Down.
- 33The far right room contains 295 Gil.
- 34In the second line of rooms, you can find a Cottage and a Copper Armlet.
- 35Still on B3, move down slightly and find the second room from the left. There is a chest surrounded by statues. Prepare to fight 2-5 Piscodemons when you approach the chest. Save your game before this fight.
- 36After the fight, obtain the Crown from the chest.
- 37Another room on the right side contains 385 Gil. You can now leave Marsh Cave.
- 38Return to Western Keep (straight North from Marsh Cave). Heal your party in Elfheim if needed, as a boss battle awaits.
- 39Go to the room in the narrow passage and talk to the King.
- 40BOSS: Astro (HP: 420): Has great defense against magic but low physical attack. Cast Temper on your main attackers (like the Warrior) on the first turn. Continue with physical attacks while under the Temper status. The boss can be defeated in 3-4 turns. Be prepared to use Phoenix Down as Astro has an instant KO spell called Death, though its success rate is low.
- 41After the fight, you obtain the Crystal Eye.
- 42Motoya's Cave:
- 43To find this place, move North-East from Cornelia.
- 44Talk to Motoya to obtain a Jolt Tonic.
- 45The three chests on the left contain Potions and an Antidote.
- 46Return to Elven Castle.
- 47Elfheim/Elven Castle:
- 48Find the sleeping Prince in the top left room. Talk to the Healer to give him the Jolt Tonic. After the scene, you obtain the Mystic Key.
- 49Mystic Treasures:
- 50Now that you have the Mystic Key, return to previously locked areas.
- 51Elven Castle: The North-East room (accessible from the South-East exit, hugging the castle wall) contains a Mythril Hammer, 800 Gil, 700 Gil, and Bronze Gloves.
- 52Cornelia Castle: The two rooms to the North (enter from the passage behind) contain a Saber, Mythril Knife, Cottage, Iron Armor, Tent, and Nitro Powder.
- Remember to buy magics for your mages after the scene with the king.
- Train on the World Map around towns to ensure you can always return to the inn for healing.
- Must buy Blizzard and Temper for your Black Mage in Pravoka.
- Be sure to buy some Antidotes in Pravoka.
- Consider buying Dia magic for your White Mage in Cornelia if you haven't already.
- Save your game before fighting the Piscodemons in Marsh Cave.
- Heal your party in Elfheim before heading to Western Keep for the boss battle.
- Chaos Shrine: Leather Cap, Potion, Tent, Garland defeated.
- Pravoka: Ship obtained.
- Marsh Cave: Dagger, Broadsword, Copper Armlet, Cottage, Phoenix Down, 680 Gil, 620 Gil, 295 Gil, 385 Gil, Crown obtained.
- Western Keep: Crystal Eye obtained.
- Motoya's Cave: Jolt Tonic, 2x Potion, Antidote.
- Elfheim/Elven Castle: Mystic Key obtained.
- Mystic Treasures: Mythril Hammer, Bronze Gloves, 800 Gil, 700 Gil, Mythril Knife, Cottage, Iron Armor, Tent, Nitro Powder, Saber, Werebuster, Gold Needle, Rune Blade, Falchion, Power Staff, Steel Gloves, Silver Armlet, Antidote, 1020 Gil.
Part 3
Navigate the treacherous Cavern of Earth, defeat the Vampire and Lich bosses, and acquire the Earth Rod in this comprehensive Final Fantasy I walkthrough.
- 1Shrine: In the North-West room, find the Werebuster and Gold Needle. The South-West room contains a Rune Blade. Gargoyles may appear before opening chests.
- 2Western Keep: Follow the right passage from the entrance to find chests containing a Falchion, Power Staff, and Steel Gloves.
- 3Marsh Cave B3: In the southernmost area, three rooms contain a Silver Armlet, Antidote, and 1020 Gil. Piscodemons must be defeated before opening chests.
- 4Mount Duergar - Cavern of Earth:
- 5Travel to the North-West dock (from Cornelia, go North-West), then South-West to Mount Duergar.
- 6Collect Gil from the room directly above the entrance.
- 7In the bottom left area, find chests with a Tent, Great Helm, Wyrmkiller, Ether, Potion, Mythril Mail, 575 Gil, and Cottage.
- 8Talk to Nerrick outside the treasure room to open a new path for your ship to the West.
- 9Sail West, pass the whirlpool, and dock near Melmond.
- 10Melmond offers an inn, inventory upgrades, and Level 5 magic spells.
- 11From Melmond, travel West to a path leading South, then follow it to the Cavern of Earth.
- 12Cavern of Earth:
- 13The West part from the entrance has frequent Hill Gigas encounters.
- 14Head North from the entrance to find 1975 Gil.
- 15The South-East area has two paths leading to rooms with an Antidote, 795 Gil, Potion, and 800 Gil.
- 16Take the East path to proceed.
- 17B2: Follow the South path to the middle area. The top-right room contains 330 Gil, a Tent, and a Coral Sword. The room at the South contains 575 Gil, 5000 Gil, and a Leather Shield. Take the South-East path to proceed.
- 18B3: The room on the right contains a Sleeping Bag. Follow the path up to the middle, then take the left path West. You will pass a room with 3400 Gil, and the next room has 1020 Gil. Proceed to the last room for a scene.
- 19BOSS: Vampire (HP: 280): Use Diara and Fira spells with your Black/White Mage, supported by physical attacks. This fight can be completed in one turn.
- 20After defeating the Vampire, collect the Star Ruby from the chest.
- 21Giant's Cave/Sage's Cave:
- 22From the Cavern of Earth, head North-West and cross the mountain West to reach Giant's Cave.
- 23Give the Star Ruby to the giant. A room contains 620 Gil, 450 Gil, a Mythril Helm, and a Great Axe.
- 24Exit through the top-left.
- 25Proceed to Sage's Cave.
- 26Talk to Sadda in the second room to obtain the Earth Rod. Return to the Cavern of Earth.
- 27Cavern of Earth (Return):
- 28Go back to B3. The room where you fought the Vampire has a door on the right leading to a tablet. Examine it to open a new path.
- 29B4: Head North to find a Staff, 3400 Gil, 1455 Gil, 1520 Gil, and 5450 Gil. Return to the fork and take the left path. Head South-West to find a room with a Tent, 1250 Gil, and a Mythril Shield. Move North-West to the next level.
- 30B5: Follow the path to the boss room. Heal and save your game. Touch the sphere to begin the fight.
- 31BOSS: Lich (HP: 1200): Use NulFrost on the first turn. Cast Temper on your main attacker. Use Fira spells every turn. Restore MP with weaker attacks. Keep allies above 150 HP. Use Diara when not healing.
- 32After defeating Lich, touch the shiny spot to leave.
- 33Travel back to Melmond, take your ship South-West to a dock on the South-East of the World Map. Follow the West path to Crescent Lake.
- 34Crescent Lake:
- 35Restock items and learn strong magic spells.
- 36Cross the top-right bridge to the right area. Talk to the sages to obtain the Canoe.
- 37Leave Crescent Lake. Use the Canoe to travel on rivers. Follow the river to the West.
- In the Marsh Cave, be prepared for Piscodemon encounters before opening chests.
- The West part of the Cavern of Earth is dangerous due to frequent Hill Gigas encounters; only go there if farming for money and EXP.
- For the Vampire boss fight, focus on magic attacks and physical support.
- For the Lich boss fight, prioritize defensive buffs and offensive elemental magic, while managing MP and HP.
- Ensure your party is healed and saved before the Lich boss fight.
- Star Ruby (after Vampire boss)
- Earth Rod (from Sadda in Sage's Cave)
Part 4
Navigate Mount Gulg and the Cavern of Ice in Final Fantasy I, detailing treasures like the Mythril Shield and strategies for the Marilith boss.
- 1Head north to reach Mount Gulg.
- 2On B2, take the door beside the stairs. The chest to the left contains the Great Sword, and the chest to the right contains 4150 Gil.
- 3Move up and follow the long path west. Turn south at the fork for chests containing 795 Gil and 750 Gil.
- 4Continue down to a large room with many chests containing 1760 Gil, 1520 Gil, 1455 Gil, 1975 Gil, Mythril Shield, Phoenix Down, Mythril Axe, Mythril Helm, Mythril Gloves, Antidote, Tent, and Hi-Potion.
- 5Exit through the door at the bottom and take the stairs at the left end to B3.
- 6Follow the path east on B3 to the next level (B4).
- 7On B4, make your way to the south-east to reach another part of B3.
- 8On B3, go straight south, then turn west at the fork. Continue until the next fork, turn south, then go all the way west.
- 9On B4, collect 2750 Gil and a Gold Needle in the first room. Follow the left path until a fork, then move west to find a room with 1760 Gil. Continue to a second room containing 7340 Gil, Flame Shield, Ice Brand, Antidote, and 880 Gil.
- 10Return to the previous fork and go south, passing a room with 155 Gil and 10 Gil. Continue east to find another room with a Cottage and 2000 Gil.
- 11Return to the earlier fork and take the bottom path to proceed, finding 1250 Gil and a Staff. This path leads to the next level (B5).
- 12On B5, go to the west room to find the Flame Mail. Head to the south-west room for a boss battle. Equip the Ice Brand, Flame Shield, and Flame Mail.
- 13BOSS: Marilith (HP: 1440). Consider using Silence, Darkness, or Sleep, though success chances are low. Her physical attacks are dangerous; keep HP above 250. For a faster fight, have your main attacker use Temper and the Ice Brand.
- 14After the battle, stand on the shiny spot to exit.
- 15Return to Crescent Lake and heal if needed. Take your ship north to find the next dock.
- 16Use your canoe to go west, pass the river and mountains, to reach the Cavern of Ice.
- 17On B1 of the Cavern of Ice, follow the only path.
- 18On B2, head to the south-west part and take the stairs.
- 19On B3, take the stairs nearby.
- 20On B2, follow the path and enter the room with a diamond-like object. Before stepping on the cracked spot, collect the treasures: Clothes and Flame Sword. Then, step on the cracked spot to proceed.
- 21On B3, go down and turn left at the fork to find Ice Armor and Mythril Gloves. Return to the fork and take the bottom path. At the next fork, search the west side for a room with a lot of Gil. Return to the fork and go right to find the stairs.
- 22On B1, open the chest for an Ether. Move to the room south of the Ether room to find 10000 Gil. Follow the right path to the south-east room. Before stepping on the cracked spot, collect the treasures: 9500 Gil, Sleeping Bag, and Ice Shield. Then, step on the cracked spot.
- 23On B2, you will appear in the room with the diamond-like object. Approach it to battle an Evil Eye (162 HP). Defeat it to get the Levistone, then step on the cracked spot again.
- 24On B3, follow the same path to the stairs.
- 25On B1, head to the north-east part and take the stairs to exit.
- 26Check the World Map for the desert located south-west of Crescent Lake.
- 27Use your ship to return to the Crescent Lake dock and walk to the Ryukahn Desert. After a scene, you will be able to use the airship.
- 28You can fly to Gaia town (north-east) to upgrade your inventory.
- 29From Gaia, fly west to reach the Cidatel of Trials (middle of the World Map). You must land your airship further away and walk to it.
- In Mount Gulg, equip the Ice Brand, Flame Shield, and Flame Mail before the Marilith boss battle.
- Consider using status effects like Silence, Darkness, or Sleep against Marilith, but be aware of the low success rate.
- Keep your party's HP above 250 during the Marilith fight due to her powerful physical attacks.
- In the Cavern of Ice, collect all treasures before stepping on cracked spots.
- After obtaining the airship, consider visiting Gaia town for upgrades before proceeding.
Similar guides you might like


100% Human-Written. AI Fact-Checked. Community Verified. Learn how AntMag verifies content