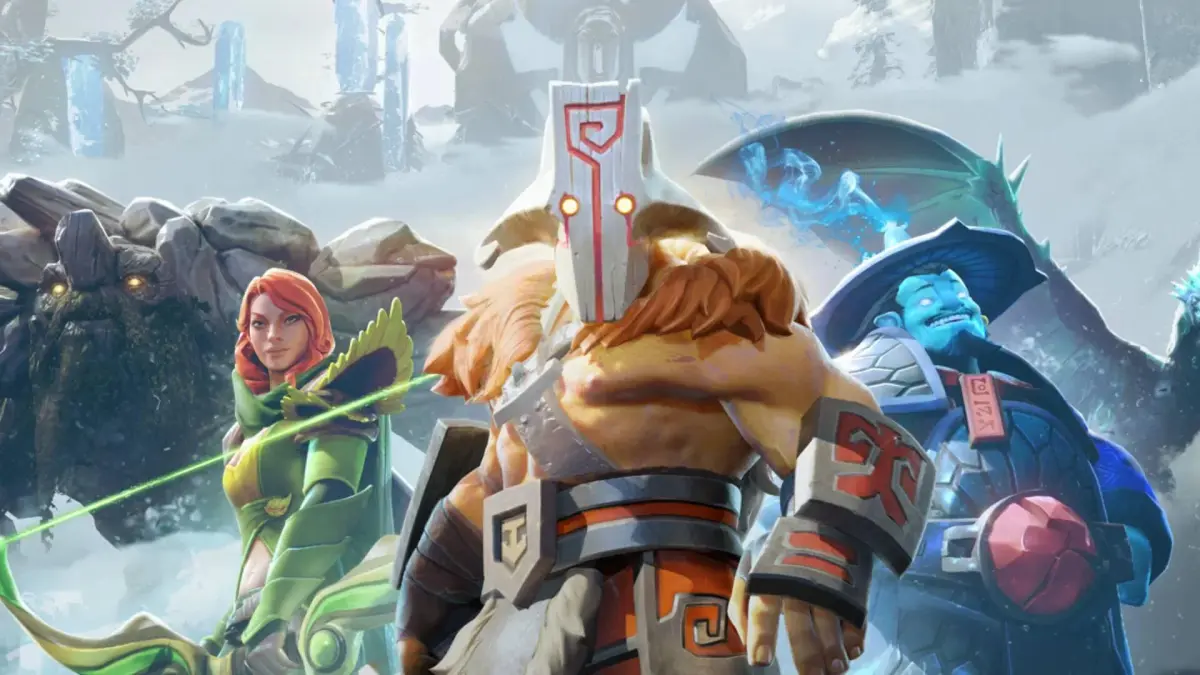
Guide yourself through Dota 2's Siltbreaker Campaign, a cooperative PvE adventure. Navigate its challenging zones and story-rich areas with this walkthrough.
Siltbreaker Campaign: A Deep Dive into Dota 2's PvE Adventure
The Siltbreaker Campaign was a highly ambitious, cooperative Player versus Environment (PvE) game mode released as part of Dota 2's 2017 Dueling Fates update. This narrative-driven experience allowed four players to team up and venture through a series of challenging, story-rich zones, deviating from the traditional 5v5 MOBA format. Crucially, while Siltbreaker is no longer actively developed or receiving new content, it remains accessible within the Dota 2 client for players to experience. However, as a legacy mode, it may not fully reflect current Dota 2 gameplay mechanics, balance, or hero interactions. approach it with the understanding that it's a distinct, self-contained experience.
Siltbreaker was structured into two distinct acts, each offering a unique narrative arc and escalating challenges:
- Act I: The Sands of Fate
- Act II: Aghanim's Path
Players would select a team of four heroes from a curated pool, with their abilities and talent trees often modified to suit the campaign's PvE focus. Success hinged on effective teamwork, strategic hero composition, and adapting to the unique mechanics presented in each zone and boss encounter.
Act I: The Sands of Fate - Journey Through the Scorched Wastes
Act I plunges players into the arid, desolate regions of the world, where ancient ruins and corrupted sands hold dark secrets. The primary objective is to uncover the source of a creeping corruption and put an end to the reign of the titular boss, Siltbreaker. This act serves as an introduction to the campaign's core mechanics and enemy types, focusing on the desert-themed environments and the encroaching blight.
Accessing Siltbreaker:
To play Siltbreaker, players need to:
- Launch Dota 2.
- Navigate to the "Play" tab.
- Under the "Game Modes" section, select "Campaigns."
- Choose "Siltbreaker: Act I - The Sands of Fate."
Note: As a legacy mode, Siltbreaker may occasionally experience minor technical issues or desyncs due to its age and lack of ongoing development. It's recommended to play with stable internet and ensure Dota 2 is up-to-date.
Key Zones and Progression in Act I:
- The Sunken City Outskirts: This is the starting area. Players will immediately face basic corrupted desert creatures like Sand Sprites (small, fast melee attackers) and Dune Scuttlers (armored melee units that charge). The environment features crumbling sandstone structures and patches of quicksand that can slow movement. The primary goal here is to push through initial enemy waves and reach the entrance to the Whispering Dunes.
- The Whispering Dunes: This zone introduces more complex enemy formations, including ranged units like Sand Stalkers (which fire piercing sand projectiles) and tougher melee units such as Dune Behemoths (large, slow-moving brutes with high HP and damage). Environmental puzzles may involve activating ancient pressure plates to open pathways or defending a specific point from overwhelming assaults for a set duration. Players might encounter Sand Elementals that can burrow and emerge to surprise them, dealing AoE damage upon reappearance.
- The Serpent's Coil: A more linear path that often involves navigating treacherous ravines and battling specialized enemies designed to disrupt coordinated pushes. Expect to encounter Serpentines, which can spit venomous projectiles that apply a damage-over-time debuff, and Sand Wurms that emerge from the ground in a line, dealing damage and knockback. This area often features narrow passages where AoE abilities are highly effective for clearing out the numerous smaller enemies.
- The Sunken City Proper: The heart of Act I, featuring labyrinthine passages, environmental traps like falling rocks and spike pits, and elite enemy units. Players will face tougher versions of previous enemies, along with new threats like Stone Golems (slow, high-armor units that can stun) and Corrupted Sentinels (ranged units that fire homing magical bolts). This area culminates in the first major boss encounter.
- The Siltbreaker's Lair: The final zone of Act I, a challenging arena where players face the formidable Siltbreaker himself. This arena is characterized by shifting sands that can slow movement and pools of corrupted water that deal damage over time.
Unique Mechanics and Challenges in Act I:
- Sandstorms: Periodic sandstorms reduce vision significantly and deal minor damage over time to heroes caught outside of cover. Players must seek shelter behind ruins or use abilities to mitigate the effects.
- Corrupted Guardians: These are elite enemies that possess enhanced abilities. For example, a Corrupted Guardian might have a powerful cleave attack or a temporary invulnerability phase. They require focused attention and coordinated damage to neutralize.
- Artifact Recovery: Certain objectives involve finding and securing ancient artifacts. These are often located in heavily defended areas and require players to defeat waves of enemies before they can be collected.
- The Siltbreaker Boss Fight: This multi-phase encounter tests players' ability to dodge area-of-effect (AoE) attacks, manage aggro, and deal with summoned minions.
- Phase 1: Siltbreaker utilizes his devastating "Quicksand" ability, which can trap heroes in place, leaving them vulnerable to subsequent attacks. He also summons Sand Sprites to harass the team.
- Phase 2: Siltbreaker gains "Sandstorm Barrage," a channeled ability that unleashes a torrent of sand in a cone, dealing heavy damage. He may also summon Dune Behemoths to pressure the team.
- Phase 3: In his final phase, Siltbreaker becomes more aggressive, combining his abilities and summoning stronger minions. Players must focus fire and utilize all their crowd control and damage to defeat him.
Recommended Loadouts and Strategies for Act I:
- Hero Synergy: A mix of crowd control (stun, slow), damage amplification, and sustain is crucial.
- Crowd Control: Crystal Maiden (Frostbite, Freezing Field), Tidehunter (Ravage), Lion (Hex, Earth Spike).
- Damage/Sustain: Wraith King (Reincarnation, Vampiric Spirit), Dragon Knight (Dragon Blood, Breathe Fire), Necrophos (Heartstopper Aura, Death Pulse).
- Utility: Shadow Shaman (Hex, Shackles), Ogre Magi (Bloodlust, Ignite).
- Itemization: Prioritize items that provide survivability and mana regeneration.
- Early Game: Boots of Speed, Magic Stick, Ring of Protection.
- Mid Game: Vanguard, Hood of Defiance, Arcane Boots, Mekansm.
- Late Game: Force Staff, Glimmer Cape, Pipe of Insight.
- Positioning: Always try to maintain a formation that allows for easy follow-up on crowd control and protects squishier heroes. Ranged heroes should stay behind melee heroes, and support heroes should position themselves to heal or cast buffs/debuffs effectively.
- Common Pitfalls: Underestimating the Sandstorm's damage, getting caught by Quicksand without a way to escape, and failing to focus down Corrupted Guardians can lead to wipes.
Act II: Aghanim's Path - Into the Frozen and Fiery Depths
Act II escalates the difficulty significantly, taking players through more hostile and diverse environments. The narrative progresses as players pursue Aghanim, the legendary wizard, through treacherous icy caverns and volcanic landscapes, facing even greater threats. This act demands more coordination and strategic depth, introducing more complex mechanics and powerful foes.
Key Zones and Progression in Act II:
- The Frozen Expanse: Icy plains and caverns filled with frost-themed enemies and environmental hazards like slippery surfaces that reduce movement speed and freezing winds that deal damage over time. Expect to fight Frost Sprites (fast, freezing melee attackers), Ice Golems (slow, high-HP units that can cast frost novas), and Blizzard Elementals (ranged units that lob ice shards).
- The Obsidian Caves: Dark, volcanic tunnels teeming with fire elementals and creatures adapted to extreme heat. Lava flows and erupting geysers present constant threats, dealing massive damage if stepped on. Enemies include Magma Fiends (melee units that leave burning ground), Fire Lords (casters that unleash fireballs and summon fire elementals), and Obsidian Golems (tough melee units with high magic resistance).
- Aghanim's Citadel Approach: A more fortified area leading to Aghanim's stronghold, often featuring elite guards and complex defensive structures. Players will encounter Arcane Sentinels (powerful magical attackers that can buff nearby enemies) and powerful elemental guardians. This area may involve activating magical conduits or disabling defensive turrets that fire energy blasts.
- Aghanim's Sanctum: The final zone of Act II, a grand and perilous arena where players confront Aghanim. The arena itself can be dynamic, with shifting platforms and environmental hazards like periodic lava eruptions or ice storms.
Unique Mechanics and Challenges in Act II:
- Environmental Hazards:
- Frozen Expanse: Freezing temperatures can slow heroes and deal damage over time. Slippery ice patches can cause heroes to slide uncontrollably, making precise movement difficult.
- Obsidian Caves: Pools of lava deal immense damage and can slow movement. Erupting geysers create temporary hazardous zones that must be avoided.
- Complex Puzzles: Act II introduces more intricate puzzles that require coordinated effort. Examples include activating pressure plates in a specific sequence to open doors, redirecting energy flows through crystals to power mechanisms, or timing movements to avoid environmental hazards while escorting an objective.
- Elite Enemy Variants: Enemies are significantly tougher, often possessing unique immunities or devastating abilities.
- Ice Golems: Can cast "Frost Nova," dealing AoE damage and freezing heroes for a short duration.
- Fire Lords: Unleash devastating AoE fire attacks and can create burning ground that deals damage over time.
- Arcane Sentinels: Possess powerful magical attacks and can buff other enemies, increasing their damage or defenses.
- The Aghanim Boss Fight: This multi-stage battle is renowned for its difficulty and requires precise execution.
- Phase 1: Aghanim utilizes "Aghanim's Scepter," a powerful beam attack that tracks heroes and deals continuous damage. He also summons "Elemental Minions" (smaller versions of the enemies encountered throughout Act II) to distract the team.
- Phase 2: Aghanim unleashes "Frozen Orb Volleys," sending out multiple homing orbs that explode on impact, dealing AoE damage and applying a slow. He may also create "Aghanim's Barrier," a powerful shield that must be broken by focusing damage on it before he can be harmed.
- Phase 3: In his final phase, Aghanim becomes enraged, combining his abilities and summoning "Elemental Lords" (powerful, unique summons with devastating abilities). A key mechanic often involves destroying specific totems or crystals around the arena to weaken him or remove his immunities. Players must master dodging his attacks, prioritizing targets, and coordinating their ultimate abilities to survive and win.
Recommended Loadouts and Strategies for Act II:
- Hero Synergy: Heroes with strong AoE damage, sustained healing, and dispels become even more critical.
- AoE Damage: Enigma (Black Hole), Invoker (Sun Strike, Meteor), Leshrac (Diabolic Edict, Pulse Nova).
- Sustained Healing: Witch Doctor (Death Ward), Dazzle (Shallow Grave, Shadow Wave), Io (Relocate, Overcharge).
- Utility/Dispel: Oracle (False Promise, Fortune's End), Abaddon (Aphotic Shield, Borrowed Time).
- Itemization: Focus on survivability, utility, and mana sustain.
- Essential Items: Black King Bar (BKB) becomes essential for surviving Aghanim's magical onslaught. Force Staff and Glimmer Cape are invaluable for repositioning and saving allies from dangerous abilities.
- Defensive Items: Pipe of Insight for magic resistance, Crimson Guard for physical damage reduction.
- Mana Regeneration: Arcane Boots, Bloodstone (for heroes who can utilize it effectively).
- Positioning and Coordination: Players must maintain tight formations to maximize AoE spells and healing. Communication is paramount for calling out enemy abilities, coordinating crowd control, and executing boss mechanics.
- Common Pitfalls: Failing to manage environmental hazards, not dispelling debuffs quickly enough, underestimating the power of elite enemies, and poor coordination during boss phases are common reasons for failure in Act II.
Rewards and Legacy
Completing Siltbreaker offered unique cosmetic rewards and achievements. While these are no longer obtainable, the campaign remains a significant piece of Dota 2's history, showcasing a successful foray into cooperative PvE content and offering a different kind of challenge for players seeking to test their teamwork and adaptability outside the standard MOBA format.
100% Human-Written. AI Fact-Checked. Community Verified. Learn how AntMag verifies content