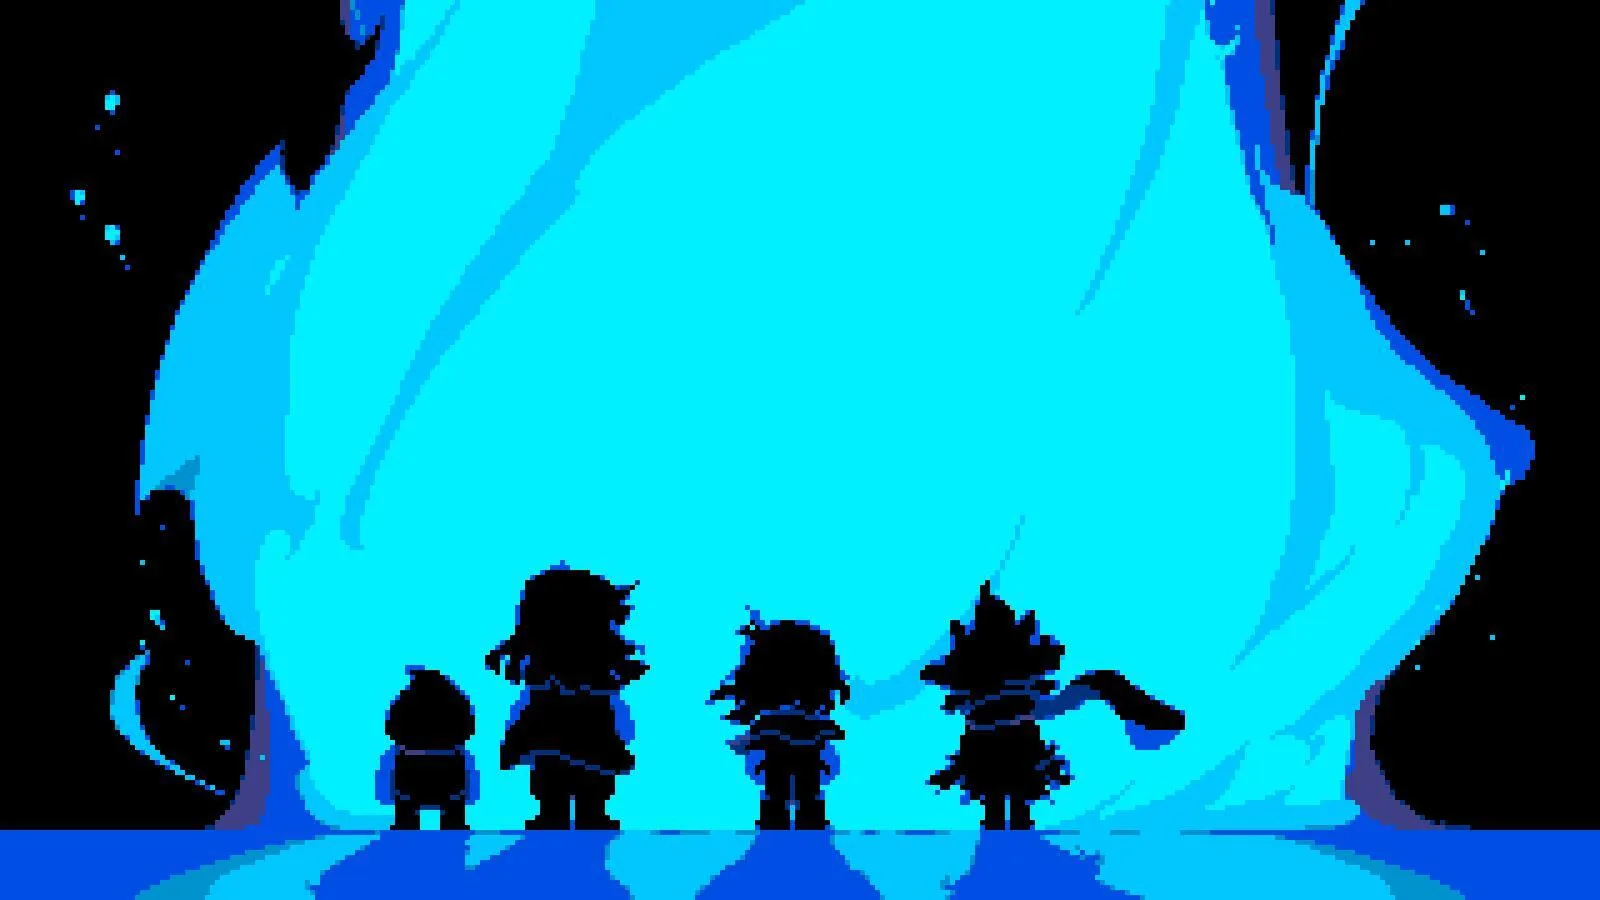
Welcome to Deltarune, a charming JRPG where you play as Kris, a kid who finds themselves in a mysterious Dark World alongside their classmate Susie. Guided by Ralsei, a prince of this realm, you're tasked with restoring balance. Moment-to-moment gameplay involves navigating this world, engaging in unique bullet-hell combat, and making choices that impact the story. It's a game that blends quirky humor with surprisingly deep narrative, perfect for anyone looking for a fresh take on the genre.
This guide is your companion through Kris's adventure, covering everything from the initial steps in Chapter 1 to the latest challenges in Chapter 2. We'll help you conquer every boss fight, like the final battle against King, and unravel the secrets hidden within locations such as Card Castle and Cyber City. Pay close attention, as your choices can lead to different Peaceful or Violent endings, with the
Part 1
Master Deltarune Chapter 1 with this comprehensive guide covering overworld controls, battle mechanics, character stats, and a detailed walkthrough of each area.
This guide provides a comprehensive walkthrough for Part 1 of Deltarune, covering controls, battling mechanics, character information, and area-specific walkthroughs.
General Information
- Overworld Controls
- Battling
- Characters
- Playstyles
Walkthrough
- ??????
- Castle Town
- Field
- Forest
- Card Castle
Encyclopedia (Items & More)
- Items
- Weapons
- Armor
- Key Items
- Light World Items
Overworld Controls
Movement: Arrow Keys
Interact/Confirm: Z
Skip Dialogue/Cancel: X
Skip Text Boxes: C
Quit Game: Esc
Battling
Battles consist of two phases: your party's turn and the enemy's turn. Your party acts first, with each member performing an action from top to bottom. Victory is achieved by depleting enemy HP or pacifying them. Defeat occurs if all party members' HP is depleted.
There are 5 commands:
- FIGHT: Attacks an opponent. Press Z when the bar is closest to the rectangle outline for maximum damage (accuracy). Damage is influenced by attacking power and target's defense.
- SPELL: Casts a spell, costing Tension Points (TP). Kris uses ACT instead, with enemy-specific effects.
- ITEM: Uses an item from your inventory.
- MERCY: Spares an enemy if their name is yellow.
- DEFEND: Reduces damage taken and boosts TP by 16%.
TP is gained through defending (16%), attacking (6-7%), and grazing enemy bullets. Higher TP at the end of a battle results in more money.
During the enemy's turn, they attack with bullet patterns. The difficulty increases with multiple enemies. Your SOUL must dodge these patterns to minimize damage. Grazing bullets awards TP.
Characters
All characters have 4 stats: HP (Hitpoints), ATK (Attack), DEF (Defense), and MAGIC. They can equip one WEAPON and two pieces of ARMOR. LV currently has no in-game use.
KRIS (LV1)
- HP: 90
- ATK: 10
- DEF: 2
- MAGIC: 0
Kris is the party leader with average stats. Their ACT spell varies by enemy and is used to make them spareable.
SUSIE (LV1)
- HP: 110
- ATK: 14
- DEF: 2
- MAGIC: 1
Susie is strong with the best stats but has limited spell usage initially. Her spell, Rude Buster (50% TP), deals great damage and can be boosted by pressing Z before it lands.
Ralsei (LV1)
- HP: 70
- ATK: 8
- DEF: 2
- MAGIC: 7
Ralsei is the weakest but has the most magic. His spells include Pacify (16% TP), which acts like MERCY on a TIRED enemy, and Heal Prayer (32% TP), which restores HP based on MAGIC.
Playstyles
You can defeat enemies by FIGHTing or using MERCY/Pacify. Your playstyle can alter certain game sections and boss encounters.
??????
Obtainable items: Glowshard
- Hazard #1: Avoid three bullets fired by a life form.
- Puzzle #1 (Eye Puzzle): Turn all eyes dark by interacting with switches. The dots above switches indicate affected eyes. Solution: Trigger the middle and right switches.
- Hazard #2: Dodge bullets from a shadowy figure.
- Hazard #3: Avoid bullets emerging from the sides while sliding.
Castle Town
Obtainable items: Manual
The only battle here is against Lancer. You can attack him or survive enough turns to win.
Field
ENEMIES
- Rudinn: ATK 6 DEF 0. Convincing makes them SPAREable. Lecturing makes all enemies TIRED.
- Hathy: ATK 7 DEF 0. Flatter makes them SPAREable. X-Flatter (requires Ralsei) makes all enemies SPAREable.
- Jigsawry: ATK 5 DEF 0. Befriending makes all Jigsawry SPAREable.
- C. Round: ATK 1 DEF 0. A joke enemy.
- Ponmen: ATK 8 DEF 0. Target indication is clear.
Part 2
Complete walkthrough for Deltarune Part 2, including puzzles, boss strategies for K. Round and Susie & Lancer, and item locations.
Obtainable items: Four Dark Candies, Broken Cake, White Ribbon.
Seam's shop wares: Dark Candy (40D$), Darkburger (70D$), Spookysword (200D$), Amber Card (100D$).
Puzzle #1: Interact with the clock to start. Press the lit switches on the ground before time runs out. This requires positioning Ralsei to press two switches simultaneously.
Puzzle #2: Another clock puzzle requiring three switches to be pressed at the same time. You'll need Susie to complete this.
Puzzle #3: A box puzzle. Push both boxes onto the switches to progress.
Puzzle #4: This puzzle cannot be solved with your current knowledge.
Puzzle #5: Tiles on the Great Board will light up. Stepping on them teleports you to the beginning of the section. Move accordingly as tiles light up row by row.
Puzzle #6: Tiles will light up on separate columns. Move from one column to the other accordingly.
BOSS: K. ROUND (ATK 9 DEF 3)
K. Round Strategy:
Kris: Any weapon, White Ribbon, Amber Card.
Susie: Mane Ax, No armor, No armor.
Ralsei: Red Scarf, Amber Card, Amber Card.
You cannot defeat K. Round aggressively as it heals itself at low HP and increases its HP and ATK. Warning him is ineffective. Give Susie weak equipment as she is actively hurting you. Kris is the most important party member to keep alive as they ACT. Ralsei is useful for healing.
All of K. Round's attacks are simple to dodge. The goal is to get the crown off its head. Bow to loosen the crown by 15%, or Deep Bow (requires Ralsei) to loosen it by 35%. Keep ACTing until the fight ends.
[105] Forest
Bloxer: ATK 9 DEF 2. Rearrange correctly to make it SPAREable.
Rabbick: ATK 8 DEF 1. Blow on a Rabbick or blow on all Rabbicks (requires Ralsei) to make it SPAREable.
Clover: ATK 8 DEF 2. Talk to him about his favourite topics (trees, cute boys, sports) to make them SPAREable (some topics require Ralsei). Talking too much makes them TIRED. This is a one-time enemy.
Obtainable items: Revive Mint, Dice Brace, Ragger.
If you have the Broken Cake, take it to smith Malius at the Bake Sale to turn it into the Top Cake. Give the Top Cake to the Top Chef to obtain the Spincake (inferior, but important for later chapters).
In the room with the flying creature, after ringing the bell, go back to the start of the room to find Starwalker. Talking to it is important for later chapters.
Between Starwalker's room and the next, there's a small chance an extra room appears with a single tree. A man behind the tree gives you an Egg.
Bake Sale wares: Choco Diamond (40D$), Hearts Donut (40D$), Lancer Cookie (40D$) (Only one).
Hazard #1: Avoid spinning diamond chains.
Puzzle #1: First card puzzle. Input the combination shown. You can input Spades or Diamonds. Swapping turns all Spades into Clubs and all Diamonds into Hearts. Overflowing the puzzle resets it. SOLUTION: Spade, Diamond, Spade, Swap.
Puzzle #2 (Optional): Another combination is required for an optional path. The password is on the bottom of the room. SOLUTION: Spade, Diamond, Swap, Spade, Swap. REWARD: Dice Brace.
Puzzle #3: Deduce the answer by talking to Clover's heads in different holes and seeing the card colors. SOLUTION: Diamond, Swap, Spade, Diamond.
Hazard #2: Avoid Scissor Dancers by getting into the small holes in their formation.
Hazard #3: Avoid a Starwalker chasing you and shooting bullets. Ring the bell to clear the threat.
Hazard #4: Stand inside the innermost circle of a rotating diamond chain. The room will darken, revealing a tree with a switch. Press the switch to continue.
Puzzle #4: The Maze. Follow the path where Lancer DOESN'T go until the middle. Then, follow the path where Susie doesn't go. Hazards include Starwalkers and Scissor Dancers.
BOSS: SUSIE (110 HP 14 ATK 2-4 DEF) & LANCER (7 ATK 1 DEF)
Fighting Strategy:
Kris: Spookysword, Dice Brace/White Ribbon, Amber Card.
Ralsei: Ragger, Dice Brace/White Ribbon, Amber Card.
(Susie's defense depends on her equipped armor.)
Deplete Lancer's HP. Depleting Susie's HP makes attacks easier to avoid, but she recovers. Kris is the main attacker, Ralsei for support.
Acting Strategy:
Kris: Any weapon, Dice Brace, White Ribbon.
Ralsei: Any weapon, Amber Card, Amber Card.
Kris gets the most armor as they are fundamental for ACTing. Ralsei is only required for the final act. You can put Susie to sleep using Lullaby (requires Ralsei), but she recovers. Using Anything on her has no effect. Use Anything or X-Anything (requires Ralsei) on Lancer. On the fourth time, Susie will block the soundwaves. For the final act, you must down or put Susie to sleep.
[106] Card Castle
Rudinn Ranger: ATK 8 DEF 0. Convince makes it tired, Compliment (requires Susie) makes it SPAREable.
Head Hathy: ATK 8 D
Part 3
Complete walkthrough for Deltarune Part 3, covering Lancer's battle, the Jevil secret boss fight, and the final King boss encounter with strategies and item recommendations.
- 1Puzzle #1: A card puzzle. Tell Susie the solution: Spade, Diamond, Swap, Spade.
- 2Boss: Lancer - You are scripted to win. Focus on dodging Lancer's attacks.
- 3Hazard #1: Avoid rotating diamond chains.
- 4Puzzle #2: Push the box to win.
- 5Hazard #2: Avoid Scissor Dancers. For an extra challenge, interact with all Lancer portraits.
- 6Puzzle #3: Push the box to win.
- 7Sidequest: Free Jevil
- Enter the basement elevator to reach ??????.
- 8Find the key to a cell.
- 9Broken Key A: Get from Seam (shopkeeper).
- 10Broken Key B: In the Scissor Dancers room, find the path in the bottom left where stars don't shine.
- 11Broken Key C: Solve Puzzle #4 in the Field using the Card Castle room order: Diamond, Swap, Diamond, Spade, Swap, Spade.
- 12Bring the three parts to Malius to repair. Return the complete key to the creature.
- 13Secret Boss: Jevil - No stats provided, prepare thoroughly.
- Fighting Strategy: Kris (Spookysword, Amber Card x2), Susie (Brave Ax, Iron Shackle, Amber Card), Ralsei (Dainty Scarf, Dice Brace, White Ribbon). Focus on Susie as main damage and Ralsei as healer. Use Rude Buster and Heal Prayer (on Susie/Ralsei only).
- 14Reward: Devilsknife, Shadow Crystal
- 15Acting Strategy: Kris (Any weapon, Dice Brace/Iron Shackle, White Ribbon/Iron Shackle), Susie (Any weapon, Amber Card x2), Ralsei (Dainty Scarf, Dice Brace/Iron Shackle/Amber Card, White Ribbon/Iron Shackle/Amber Card). Gather TP for Kris's acts like Pirouette or Hypnosis to tire Jevil and pacify him. This method is harder.
- 16Reward: Jevilstail, Shadow Crystal
- 17Boss: K. Round (9 ATK 3 DEF)
- Strategy: Kris (Any weapon, Dice Brace/Iron Shackle, White Ribbon/Iron Shackle), Susie (Any weapon, Dice Brace/Iron Shackle, Iron Shackle/Amber Card), Ralsei (Dainty Scarf, Jevilstail, Amber Card). This fight is easy. The goal is to loosen its crown. Use Kris's Bow or throw Ralsei at it and press C to hit the crown.
- 18Final Boss: King (8 ATK 0 DEF)
- Special Acts: Courage (Kris, 20%TP), Red Buster (Susie, 60%TP), Dual Heal (Ralsei, 50%TP).
- 19Fighting Strategy: Kris (Spookysword, Dice Brace, White Ribbon), Susie (Devilsknife/Brave Ax, Iron Shackle, Amber Card), Ralsei (Dainty Scarf, Amber Card x2). Use Dual Heal for healing and Red Buster for damage.
- 20Acting Strategy: Kris (Any weapon, Dice Brace/Iron Shackle, White Ribbon/Iron Shackle), Susie (Any weapon, Amber Card x2), Ralsei (Dainty Scarf, Jevilstail, Dice Brace/Iron Shackle/White Ribbon). Use Courage + DEFEND to minimize damage. Use Dual Heal as needed. You cannot spare King; the goal is to survive.
Rouxls Kaard's Shop:
- Rouxls Roux (50D$)
- Brave Ax (150D$)
- Dainty Scarf (200D$)
- Amber Card (100D$)
Obtainable Items:
- Revive Mint
- Clubs Sandwich
- Iron Shackle
End of Chapter Differences:
- NPC dialogue in Card Castle changes based on fighting or sparing them.
- The sequence after defeating King changes based on whether you fought enemies (A) or fought no one (B).
Part 4
A comprehensive guide to all items, weapons, and armor in Deltarune Part 4, including their stats, locations, and effects. Learn how to obtain every piece of equipment.
Items:
- Glowshard: Makes all Rudinns SPAREable. Sellable for 100D$. Obtainable in prologue.
- Manual: Can make enemies tired. Obtained in prologue.
- Dark Candy: Heals 40 HP. Costs 40D$ at Field/Seam's shop.
- Darkburger: Heals 70 HP. Costs 70D$ at Seam's shop.
- Top Cake: Heals 160 HP to the whole team. Obtainable by fixing the Broken Cake (only 1).
- Spin Cake: Heals 80HP to the whole team. Obtainable by bringing the Top Cake to Top Chef (only 1).
- Choco Diamond: Heals 80 HP to Kris, 20 HP to Susie (outside battle)/30 HP (in battle), & 50 HP to Ralsei (outside battle)/30 HP (in battle). Costs 40D$ at Bake Sale.
- Hearts Donut: Heals 20 HP to Kris (outside battle)/10 HP (in battle), 80 HP to Susie (outside battle)/90 HP (in battle), & 50 HP to Ralsei (outside battle)/60 HP (in battle). Costs 40 D$ at Bake Sale.
- Lancer Cookie: Heals 4 HP (outside battle)/50 HP (in battle). Costs 40D$ at Bake Sale (only 1).
- Revive Mint: Revives a downed ally to MAX HP. Obtainable on Forest/Card Castle (only 2).
- Clubs Sandwich: Heals 30 HP to the whole team. Obtainable on Card Castle (only 1).
- Rouxls Roux: Heals 50 HP. Costs 50D$ at Rouxls' shop.
Weapons:
- Wood Blade: Kris' default weapon.
- Mane Ax: Susie's default weapon.
- Red Scarf: Ralsei's default weapon.
- Spookysword: +2 ATK to Kris. Obtainable on Seam's shop (costs 200D$).
- Ragger: +2 ATK to Ralsei. Obtainable on Forest.
- Brave Ax: +2 ATK to Susie. Obtainable on Rouxls' shop (costs 150D$).
- Dainty Scarf: +2 MAGIC to Ralsei. Obtainable on Rouxls' shop (costs 200D$).
- Devilsknife: +5 ATK & +4 MAGIC to Susie. Buster TP DOWN ability. Obtainable after defeating Jevil through FIGHTing (makes Jevilstail unobtainable).
Armor:
- White Ribbon: +2 DEF to anyone except Susie. Obtainable on Field (only one).
- Amber Card: +1 DEF. Obtainable on Seam & Rouxls' shop (costs 100D$).
- Dice Brace: +2 DEF. Obtainable on Forest (only one).
- Iron Shackle: +1 ATK & +2 DEF (only one).
- Jevilstail: +2 ATK, +2 DEF & +2 MAGIC. Obtainable when defeating Jevil through ACTing (only one) (makes Devilsknife unobtainable).
Key Items:
- Cell Phone: Default Item. No use.
- Broken Cake: Obtainable in Field. Can be repaired to obtain the Top Cake.
- Egg: Obtainable from a mysterious man on a secret room. Can be placed on Asgore's fridge.
- Broken Key A: Obtainable from Seam. First part of the Door Key.
- Broken Key B: Obtainable in Forest. Second part of the Door Key.
- Broken Key C: Obtainable in Field. Third part of the Door Key.
- Door Key: Obtainable from fixing Broken Key A, B & C. Allows access to Jevil's boss fight.
- Shadow Crystal: Obtainable by defeating Jevil. Can be interacted with.
Light World Items:
- Ball of Junk: Obtained after leaving the Dark World (items collected there).
- Glass: Obtained after leaving the Dark World having defeated Jevil. Can be interacted with.
- Egg: Obtained after leaving the Dark World having received the Egg.
- Hot Chocolate: Obtainable from the attendant at QC's diner. Can be drunk.
- Bouquet: Obtainable from Asgore. Can be given to Toriel.
- Pencil: +1 ATK. Default weapon.
- Halloween Pencil: +1 ATK. Obtained after leaving the Dark World while holding the Spookysword.
- Bandage: Default armor.
Similar guides you might like

100% Human-Written. AI Fact-Checked. Community Verified. Learn how AntMag verifies content