
Welcome to Arkham Asylum, Batman! Rocksteady's 2009 masterpiece throws you into the cape and cowl as the Caped Crusader, tasked with stopping the Joker's takeover of the infamous island asylum. This isn't just a beat-'em-up; you'll be exploring its treacherous halls, utilizing stealth to outsmart hordes of henchmen, and solving environmental puzzles as you uncover Gotham's darkest secrets. It's a thrilling blend of action, exploration, and detective work that's perfect for anyone looking to truly embody the ultimate vigilante.
This guide is your key to mastering every aspect of Batman: Arkham Asylum. We'll walk you through every challenging boss fight, from the Scarecrow's terrifying hallucinations to the Joker's final confrontation. Discover the locations of every hidden collectible scattered throughout the asylum, ensuring you don't miss a single piece of lore or upgrade. We'll also help you navigate the game's stealth sections and puzzles, ensuring you can bring the Joker's reign of terror to a definitive end and achieve the ultimate victory.
3B. Menus/Display =
Navigate Batman: Arkham Asylum's menus, including Main Menu, Pause Menu, Options, and Map. Learn about difficulty settings and Waynetech upgrades.
Main Menu
After starting Batman: Arkham Asylum and creating a profile, you will access the early options screen to adjust Brightness and Subtitles. You then select your difficulty level before beginning the game. Difficulty affects enemy damage, your XP damage recovery (less on higher difficulties), and enemy awareness during predator sequences. On Hard difficulty, enemies will not have icons above their heads during attacks.
From the Main Menu, you can choose:
- Continue Story: Return to the game from your last checkpoint (an auto-save point you restart from on death).
- Challenge Mode: Access Combat and Predator challenges.
- Downloadable Content: Access extra Challenge Maps.
- Character Bios: View biographies of characters.
- Character Trophies: View 3D character models.
- Options: Access the Options Menu.
Pause Menu
Pressing Start during gameplay brings up the Pause Menu:
- Resume: Return to gameplay.
- Restart from Checkpoint: Load your last checkpoint.
- Restart Challenge: Begin the current Challenge again (only in Challenge Mode).
- Game Options/Audio Options/Controller Configuration: Access these settings.
- Quit: Return to the Main Menu. Game data is only saved from your last checkpoint.
Options Menu
Accessible from both the Main Menu and Pause Menu:
- Game Options:
- Invert Look: Reverses the y-axis for camera movement.
- Invert Rotation: Reverses the x-axis for camera movement.
- Invert Flight: Reverses axes for gliding.
- Camera Assist: Automatically adjusts the camera when Batman is walking or crouching.
- Brightness: Adjusts screen brightness.
- Motion Sensor Function: Enables SIXAXIS controls.
- Audio Options:
- Subtitles: Turns on captions for spoken dialogue.
- Volumes: Adjusts SFX, music, and dialogue volume.
- Controller Configuration: View current controls and cycle through two different configurations, primarily affecting L1/L2 and R1/R2 functions.
Map Menu
Pressing Select during gameplay opens the Map Menu. New sections are added as you progress.
- Map & Objectives: Use the left stick to navigate the map and L2/R2 to zoom. Press Square to center on Batman. While viewing grounds, press X to examine a building's map or Circle to return to the grounds view.
- Waynetech: This menu appears when you earn enough experience for an upgrade. You can spend experience points on improvements. Not all upgrades are available immediately; some require prerequisite upgrades or game progression.
- Riddler's Challenges: Opens after receiving the first call from the Riddler in Intensive Treatment. Displays a grid of challenges for each game area, which are ticked off as found.
- Character Bios: Similar to the Main Menu list. Unlocked bios can be viewed immediately after unlocking by pressing Select.
- Adjusting Brightness and Subtitles can significantly improve your experience, especially in darker areas or for understanding dialogue.
- Pay attention to the Waynetech menu when it becomes available, as upgrades are crucial for progression and tackling harder challenges.
- The Map Menu is essential for tracking objectives and locating Riddler's Challenges.
3C. Gadgets and Upgrades =
Explore all gadgets in Batman: Arkham Asylum, including the Batarang, Batclaw, Explosive Gel, and more, with details on their uses and upgrades.
Batarang
Batman has this weapon from the beginning. This is Batman's primary distance weapon. It can be used to stun enemies, break cables, hit power boxes from long-range, or shatter Joker Teeth. Hold L1 to ready a Batarang. Use the right stick to aim the reticle at your intended target, then press R1 to throw. Also, a quick tap of L1 will toss a Batarang at your nearest target, useful for a quick move during combat. An enemy struck with a Batarang will be stunned for a few moments, but only if they're unaware of you. If an enemy is aware of you, Batarangs will only knock them back for just a moment, or may be dodged entirely. The exception to this is the Combo Batarang, which is described in its section in Upgrades. The Batarang can be powered up with both Combo Batarang and Batarang Power.
Multi-Batarang
Both the Twin and Triple Batarang need to be bought through upgrades. Simply put, this is a multi-shot Batarang which you can use to hit multiple enemies. Hold L1 to ready your Batarangs. Use the right stick to aim the reticles at your targets, then press R1 to throw. Your targets must be relatively close to each other to all be in the same throw. For all intents and purposes, they act the same as a single Batarang, including receiving more power through the same Batarang upgrades. There is a cool-down time once you use this; you'll be able to use them again in about five seconds.
Remote Control Batarang
This weapon must be bought through an upgrade. This is a special Batarang that can be steered in mid-flight. Hold L1 to ready the Batarang. . Once the Batarang is in the air, use the right stick to steer it. While this can be unwieldy to use, with practice, you can hit multiple targets. There is a cool-down time once you use this; you'll be able to use them again in about ten seconds.
Sonic Batarang
This weapon must be bought through an upgrade. It can only be bought once you learn about the "suicide collars" in Arkham Mansion. This is a high-tech Batarang that emits a sonic pulse. Hold L1 to ready the Batarang. . Once the Batarang sticks to its target, it will emit a sonic pulse that responds to the collars placed on inmates. This will cause an inmate to come and investigate the noise. There is a cool-down time once you use this; you'll be able to use them again in about a minute. By purchasing the Sonic Shock Batarang, you can add a function to electrocute the enemy that approaches the Batarang. Press R2 once the enemy gets close to release the shock. Once you do this, though, you cannot throw another Sonic Batarang. Also, if an enemy shoots a Sonic Batarang to cause it to release its shock early, it will be the same as if you detonated it, and you won't be able to use it again.
Explosive Gel
This weapon is found in the Batmobile after you leave Intensive Treatment. Use this to lay a dose of gel that you can detonate, causing an explosion. Hold L1 to ready the dispenser, then press R1 to lay down a dose. Once you do so, hold L1 and press R2 to detonate. If standing near a wall, you'll lay the dose on the wall, otherwise you'll lay it on the floor. Place gel on a structurally weak wall or floor to destroy it. If an enemy is on gel when it detonates, they'll be stunned. If gel is used to explode a wall, any enemies hit will be knocked out. You can only lay three doses of gel at a time. The Gel can be upgraded, both with Multiple Frequency and Auto Proximity.
Batclaw
This weapon is found in the Batcave following your fight with Bane. The claw attachment allows your grapple to grab and pull obstacles. Hold L1 to ready the claw and use the right stick to aim. Press R1 to fire. Attach the claw to an enemy to drag them. If they get dragged over a ledge, they will be knocked out. Otherwise, they will stumble towards you for a couple of seconds. Attach the claw to a wall-suspended vent to drag it off its housing. You can also rapid-fire the Batclaw by double-tapping R2. It will attach to the nearest target.
Cryptographic Sequencer
Batman starts using this tool once you find Warden Sharp in the Penitentiary. This device is used by Batman to short-out boxes that power energy fields and similar devices. Hold L1 to bring up the device, find a box you can use it on with the right stick, and press R1 to begin cracking. To crack the box, you'll need to point both thumbsticks in the correct direction and hold them there for a couple of seconds. You'll know you're getting closer when the oscillating wave increases in amplitude. Once the screen of the sequencer turns green, you've found the spot. Certain targets are more difficult than others; the difficulty determines how precise you have to be on the direction on each thumbstick. The sequencer can be upgraded, both in Range and Power.
Line Launcher
Batman calls in the Batwing to take this tool after defeating the twin set of Titans in the Botanical Gardens. This tool is used to cross horizontal expanses. Hold L1 to ready the device. Look at the reticle to see if there's a yellow bar above and below it. If both are there, then you have attach points for both ends and can fire the device with R1. While travelling, you can press X at any time to detach and drop to the floor. If there are enemies in your way, you'll plow through them. You can also use this to break through windows.
Ultra Batclaw
Batman assembles this device once he returns to the Batcave after escaping Killer Croc. This tool is an upgrade to the Batclaw. Hold L1 to ready the claw and use the right stick to aim. Press R1 to fire. In addition to everything the regular Batclaw can do, this upgraded version can also pull enemies towards you.
- Upgrade your Batarangs early to increase their effectiveness in combat and for environmental interactions.
- The Remote Control Batarang and Sonic Batarang require practice to master but can be invaluable for crowd control and puzzle-solving.
- Explosive Gel is excellent for setting traps or destroying weak points in the environment, but remember you can only lay three doses at a time.
- The Batclaw is not just for pulling objects; it can also be used to pull enemies off ledges for instant knockouts.
- Mastering the Cryptographic Sequencer is key to bypassing security systems and accessing new areas.
3D. Exploration Tips =
Discover essential exploration tips for Batman: Arkham Asylum. Learn to use Detective Mode, navigate hazards, find secrets, and unlock new areas to fully explore Arkham Island.
Hey there! So, you're diving into Batman: Arkham Asylum and want to make sure you're not missing anything, right? It's a big place, and sometimes the best way forward isn't always obvious. Let's go over some general tips to help you explore Arkham Island like a pro.
First off, whenever you step into a new spot, do yourself a favor and pull up Detective Mode. It's your best friend for spotting things. You'll immediately see any enemies hanging around, whether they're armed or not. But don't stop there! Keep scanning. Detective Mode also highlights other important stuff: weak walls you can smash through, vent covers you can pop open, and anything else that might offer a new path or a sneaky advantage against baddies. It's all about finding those little shortcuts and secrets.
Now, let's talk about falling. Don't worry too much about taking a tumble. The game's pretty forgiving. If you fall from a great height, Batman will automatically deploy his cape to glide, slowing your descent before you hit the ground. If you happen to land in water, he'll just swim you back to the nearest solid ground. However, if you fall into a truly bottomless pit or a nasty gas-filled area, things get a bit more serious. You'll slow down, and a prompt will appear to press R1 to 'escape.' Do that, and Batman will grapple back to a safe spot you passed earlier.
And here's a classic: look up! Seriously, it sounds simple, but you'd be surprised how many paths are hidden above. Just because a ledge looks out of reach doesn't mean it is for Batman. Use your grapple to check out those high points. You might find routes or vantage points you never would have considered otherwise.
A huge part of exploring, especially when you're hunting down those tricky Riddler Challenges, involves keeping an eye out for hidden crawl spaces. These little openings often lead to secret areas where you can find hidden Trophies. Also, if any part of an area just looks… off, or stands out in some way, investigate it. It might be the key to solving one of the Riddler's puzzles.
Finally, don't get frustrated if you hit a dead end or can't reach something right away. Arkham Asylum does a good job of guiding you forward by sometimes blocking off old paths. But trust me, by the time you reach the end of the game – and you'll definitely know when that is – you'll have access to the entire island. So, keep exploring, keep using those tools, and you'll uncover everything.
3E. Combat Tips & Enemies =
Learn Batman's combat moves like Strike, Counter, and Cape Stun. Discover how to handle basic Henchmen and other enemies to dominate every fight in Batman: Arkham Asylum.
Alright, let's talk about staying alive and dishing out the pain in Batman: Arkham Asylum. Your health meter is right there in the top-left corner. If it hits zero, well, you know what happens – retry or quit. Retrying just drops you back at your last checkpoint. Good news is, your health creeps back up as you gain experience, mostly from finding secrets or, you guessed it, beating up bad guys. Just remember, that health boost only kicks in *after* a fight, so don't expect to heal mid-brawl. And on harder difficulties, you'll get less health back after each scrap.
Combat here is all about that 'Freeflow' style. Think of it like this: the game's pretty smart about who you're trying to punch. Just move towards a nearby enemy and hit an attack button, and Batman will automatically target them. It makes stringing attacks together way easier.
Speaking of stringing attacks, your combo is super important. Keep hitting enemies without missing or breaking away for too long, and your combo meter goes up. This means more experience for faster upgrades and higher scores in Challenge Mode. Plus, some of the really powerful special moves you can unlock later *require* a good running combo, so get used to keeping that streak alive!
Now, let's break down the moves you'll be using:
- Strike: This is your bread and butter. Just keep mashing that attack button to pound on the bad guys. Most of these goons aren't exactly defensive geniuses, so you can usually just wail on them. But don't get too comfortable, or they might get the drop on you.
- Counter: See that blue lightning bolt icon above an enemy's head? That means they're about to clock you. Only one enemy attacks at a time, so you don't need to aim – just hit the Counter button (Triangle) to stop them in their tracks. You *could* theoretically fight with only counters, but enemies often attack just outside your combo timing, making it tricky. Sometimes you can get away with a strike when you see the icon, but it's way safer to just counter. Heads up: On Hard difficulty, those counter icons disappear! You'll have to rely purely on watching enemy movements, especially the ones charging at you.
- Cape Stun: A quick spin of the cape stuns any nearby enemies for a few seconds. This is great for crowd control if a few baddies are bunched up. You'll actually *need* this move for certain enemy types later on.
- Evade/Vault: Double-tap the Evade button (X) to do a roll. If you're not near an enemy, it's just a dodge. But if you do it *towards* an enemy, Batman vaults off them, putting distance between you. This is essential for some tougher foes and super handy for breaking away from a big group to pick off enemies one by one. Your combo stays active during a vault, too, unless you do two rolls back-to-back. Bonus: during Titan fights, you're invincible while vaulting, even if a Titan charges right through you!
- Ground Takedown: Got an enemy down on the floor? This is your finisher. Just be careful, though – it can be interrupted. Trying to do this in the middle of a big brawl is usually a bad idea.
- Special Moves (Throw & Takedown): These moves basically pause the action for a moment while Batman does his thing. They're great for getting a quick breather, but you gotta be ready to jump right back into the fray. Remember, you need to unlock these first and build up a decent combo to use them. Also, watch out – things like heavy boxes being thrown, Titans charging, or enemies with guns can still interrupt these.
- Batarang: Don't forget your trusty Batarangs! If you find yourself with a moment where no one's close enough to punch, tap the Batarang button (L1) to toss one. It's not ideal for a close-quarters fight, as you might get hit while throwing. BUT, if there are enemies with guns in a group, a Batarang is perfect for knocking those weapons aside. If you've got the Combo Batarang upgrade, you can even weave these into your combo seamlessly. Twin or Triple Batarangs just throw more at once. Batarangs during combos always knock enemies down, helping you regain control.
- Batclaw: I totally forgot about this on my first playthrough, but there's a quick-use function (double-tap R2) for a reason! Use it to make an enemy stumble, setting them up for an attack. It takes a second to pull off, so make sure you have a little breathing room before you use it. With the Ultra upgrade, you can even hit three enemies at once!
- Other Tools: Try to avoid using things like Explosive Gel or the Line Launcher in the middle of a fight. They're much more effective when enemies don't know you're there yet, and setting them up takes too much time.
Now, about the guys you'll be fighting:
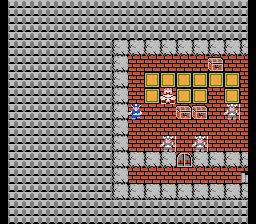
- Henchman: These are your standard thugs. They mostly just want to get up close and punch you. Their real danger comes from their numbers, so that's when you really need to be careful.
Similar guides you might like


100% Human-Written. AI Fact-Checked. Community Verified. Learn how AntMag verifies content