Begin your modding journey with The Witcher 3 REDkit. Learn to create custom content and utilize this official tool for unique game experiences.
Welcome, aspiring modders and creative minds! The Witcher 3 REDkit is a powerful, official modding tool that allows you to delve deep into the world of Geralt of Rivia and craft your own unique experiences. This comprehensive guide will walk you through the essentials of getting started, understanding its core functionalities, and even deploying your first custom content. Whether you're looking to tweak existing quests, design new areas, or introduce entirely new gameplay mechanics, the REDkit is your gateway to limitless possibilities.
Getting Started with REDkit
Before you can begin your modding journey, you'll need to ensure you have the REDkit installed and configured correctly. It's designed to seamlessly integrate with your existing Witcher 3 installation.
Installation and Initial Setup
- Acquire the REDkit: The REDkit is typically available through the same platform where you purchased The Witcher 3: Wild Hunt (e.g., Steam, GOG). Navigate to your game library and look for "The Witcher 3 REDkit" or a similar entry.
- Install to a Dedicated Directory: While the REDkit can be installed alongside your game, it's highly recommended to install it in a separate, dedicated directory. This prevents potential conflicts and keeps your project files organized. For example, if your game is in
C:\Program Files (x86)\Steam\steamapps\common\The Witcher 3, consider installing REDkit toC:\The Witcher 3 REDkit. - Launch the REDkit Editor: Once installed, locate the executable file, usually named
W3Editor.exe, within your REDkit installation folder. Double-click to launch the editor. - Initial Project Setup: The first time you launch, you might be prompted to set up a new project. It's advisable to create a new project for each distinct mod you plan to develop. Give your project a descriptive name, such as "MyCustomQuestMod" or "NovigradOverhaul."
Understanding the REDkit Interface
The REDkit interface can seem daunting at first due to its extensive features. Here's a breakdown of key areas you'll encounter:
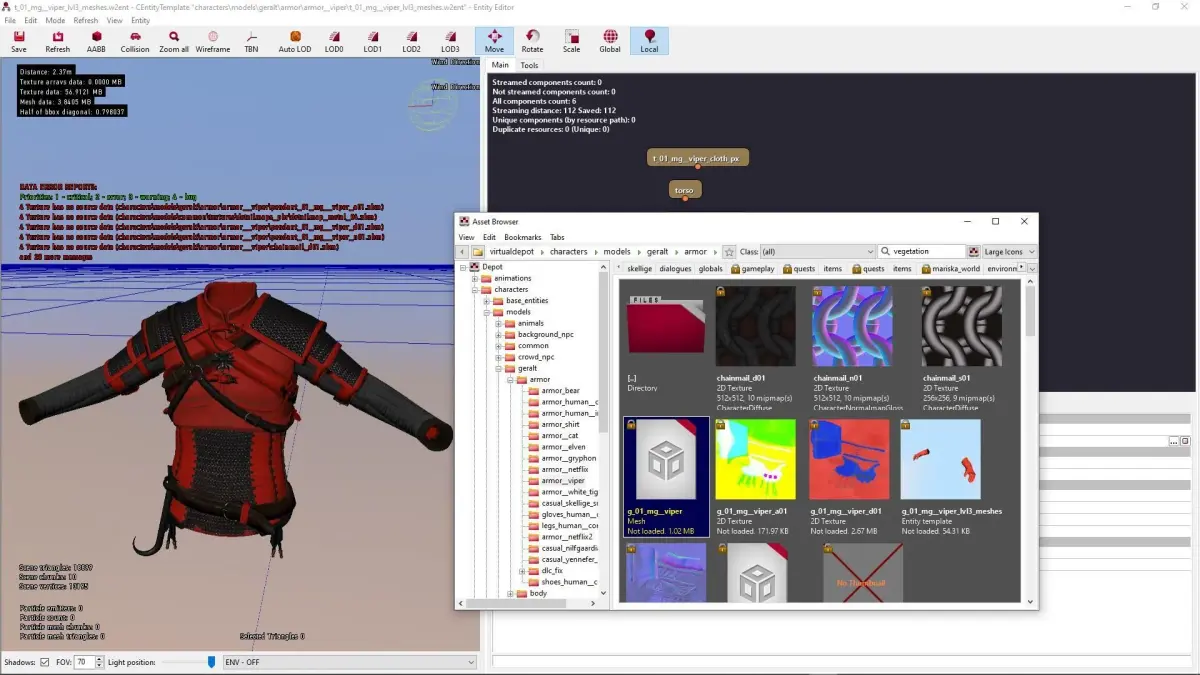
- Asset Browser: Located typically on the left, this panel allows you to navigate through all game assets – models, textures, scripts, sound files, and more. You'll use this extensively to find existing assets to modify or to import your own.
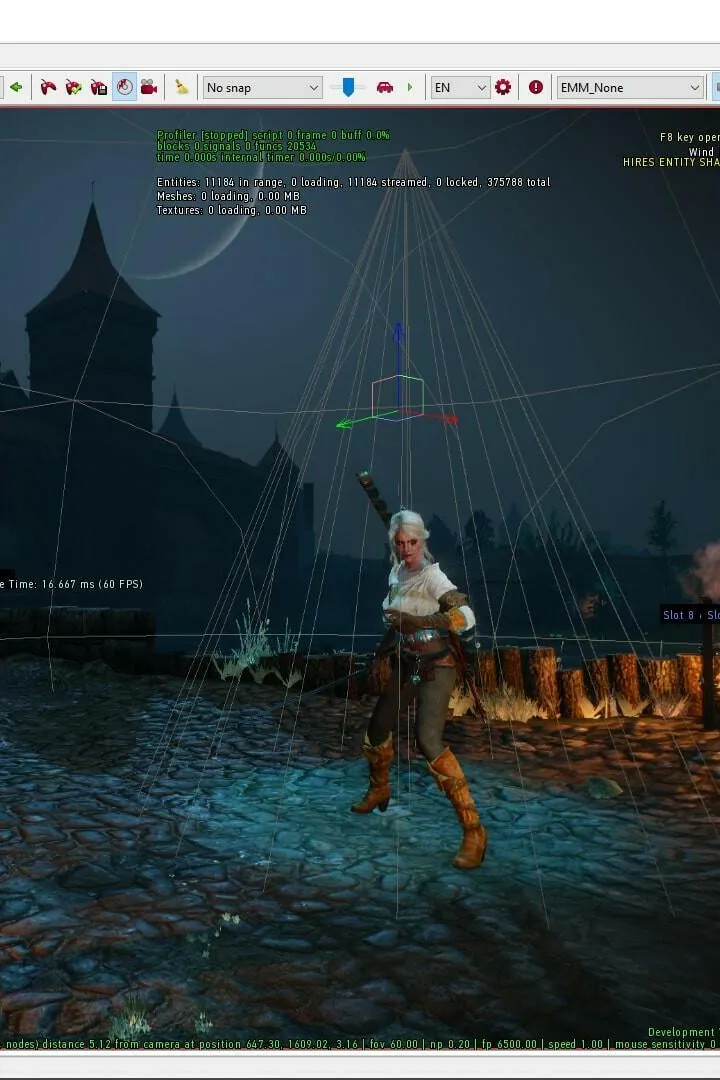
- Viewport: The central and largest pane, this is where you visualize and manipulate the game world. You can move around, select objects, and see changes in real-time.
- Properties Panel: Usually on the right, this panel displays the properties of any selected object in the viewport or asset browser. Here, you can adjust parameters like position, rotation, scale, material properties, and script variables.
- Output Log: Often at the bottom, this window provides crucial feedback, displaying errors, warnings, and general information about your actions within the editor. Keep an eye on this for troubleshooting.
- Toolbar: Located at the top, this contains quick access buttons for common operations like saving, undo/redo, camera controls, and various editing modes (e.g., terrain editing, object placement).
Core Modding Strategies with REDkit
The REDkit empowers you to modify nearly every aspect of The Witcher 3. Here are some fundamental strategies and actionable steps for common modding tasks.
Creating a New Quest
Designing a new quest involves several interconnected steps, from scripting dialogue to placing NPCs and defining objectives.
- Open the Quest Editor: From the REDkit toolbar, locate and click the "Quest Editor" icon (often represented by a scroll or a quest marker). This will open a dedicated interface for quest design.
- Define Quest Stages: In the Quest Editor, create new quest stages. Each stage represents a distinct phase of your quest. For example, "Stage 1: Investigate the Abandoned Hut," "Stage 2: Confront the Bandit Leader."
- Script Dialogue: Within each stage, you can add dialogue nodes. Select an NPC (e.g., Villager_01, Guard_Captain_Novigrad) from the Asset Browser and drag them into your quest flow. Use the dialogue editor to write lines, define choices, and link them to subsequent quest actions.
- Place Key Objects and NPCs: Switch back to the main Viewport. Use the "Object Placement" tool to drag and drop NPCs, interactable objects (e.g., Chest_Common_01, Letter_Scroll_01), and environmental elements into your desired locations. For instance, you might place a unique monster like a Fiend_Greater in a specific cave near Oxenfurt.
- Trigger Events and Objectives: Link your quest stages to in-game events. This could be interacting with a specific object, defeating a particular enemy, or reaching a designated area. Use the "Trigger" component in the Properties Panel for objects or define area triggers using the "Volume" tool. For example, a trigger volume around the Eternal Fire Temple in Novigrad could update a quest objective upon entry.
- Test Thoroughly: Save your project frequently. Use the "Play Test" feature within the REDkit to jump into your modded game and test your quest flow, dialogue, and triggers. Pay close attention to potential bugs or logical inconsistencies.
Modifying Existing Locations
Want to add a new merchant to Crow's Perch or expand a small village in Velen? The REDkit makes world editing accessible.
- Load the Desired Map: In the Asset Browser, navigate to the "levels" folder. Find the map file corresponding to the area you wish to modify (e.g.,
levels\novigrad\novigrad.w2wfor Novigrad, orlevels\velen\velen.w2wfor Velen). Double-click to load it into the Viewport. - Utilize Terrain Tools: For altering the landscape, select the "Terrain Editor" from the toolbar. You can sculpt, flatten, raise, or lower terrain using various brush sizes and strengths. For example, you could create a new hill overlooking the Pontar River.
- Place Environmental Assets: Drag and drop environmental assets from the Asset Browser into your map. This includes trees (e.g., Tree_Oak_Large_01), rocks (e.g., Rock_Boulder_03), buildings (e.g., House_Village_Small_02), and props. Remember to adjust their position, rotation, and scale in the Properties Panel.
- Add Lighting and Weather Effects: Use the "Light Editor" to place new light sources (e.g., PointLight_Warm, DirectionalLight_Sun) or modify existing ones. You can also adjust weather presets to create different atmospheres for your modified areas.
- Populate with NPCs and Wildlife: Drag and drop various NPC archetypes (e.g., Peasant_Male_01, Guard_Novigrad_Sword) and wildlife (e.g., Wolf_Common, Deer_Forest) into your scene. Define their patrol paths or spawn points using the appropriate tools.
Creating Custom Items and Recipes
Introducing new swords, armor sets, or alchemy ingredients is a popular modding avenue.
- Duplicate Existing Assets: The easiest way to create a new item is to duplicate an existing one. In the Asset Browser, navigate to the "items" folder, find an item similar to what you want to create (e.g., Sword_Steel_Basic), right-click, and select "Duplicate." Rename the new asset (e.g., Sword_Steel_MyCustom).
- Modify Item Properties: Open your duplicated item. In the Properties Panel, you can adjust numerous attributes:
- Stats: Modify damage values (e.g.,
damage_min,damage_max), armor rating, critical hit chance, and other combat-related statistics. - Visuals: Link to a new mesh (model) and textures if you have custom assets.
- Description: Update the item's name and lore description to reflect its unique nature.
- Effects: Add or modify special effects, such as increased sign intensity or poison resistance.
- Stats: Modify damage values (e.g.,
- Create a New Recipe (Optional): If your item is craftable, you'll need a recipe. Navigate to the "recipes" folder in the Asset Browser, duplicate an existing recipe (e.g., Recipe_Sword_Steel_Basic), and rename it.
- Define Recipe Components: In your new recipe's properties, specify the ingredients required (e.g., Iron_Ore, Leather_Scraps) and the quantity of each. Link the recipe to your newly created item as the output.
- Integrate into the Game: To make your item or recipe available, you'll need to either:
- Add to Merchant Inventories: Modify a merchant's inventory script to include your new item/recipe.
- Place in World: Manually place your item in a chest or as loot from a specific enemy using the Object Placement tool.
- Reward from Quest: Integrate it as a reward for a custom quest you've created.
Remember, the REDkit is a powerful but complex tool. Start with small, manageable projects, experiment frequently, and don't be afraid to consult community resources and tutorials for specific challenges. Happy modding, Witcher!
100% Human-Written. AI Fact-Checked. Community Verified. Learn how AntMag verifies content