Navigate Part 2 of Etrian Odyssey IV: Legends of the Titan, covering Lush Woodlands, Scarlet Pillars, and Miasma Forest, including boss strategies.
Valley Spring
Monsters: Deathstalker, Mandrake, Big Roller, Angry Baboon. FOE (Field Other Enemy): FuryHorn. Materials: Supple Branch, Guaiacum Wood. Treasure: Solid Moccasins C-1, Pelta B-2, Old Breastplate B-2.
The shortcut at C-2 will enable you to get past the river blocking your path. The Furyhorn only patrols a small corridor and is easily avoided. The Old Breastplate inside the locked chest is obtained as part of a pub request, Treasure on my mind.
Lush Woodlands
F1
Monsters: same as the minor dungeons. FOE: Cutter. Materials: Forest Aloe, Small Flower. Treasure: Main Gauche.
Many of the passages in this dungeon are blocked by tree branches. To remove the branches you must lure the Cutter bear FOE's in front of the branches and they will destroy them permanently, the first Cutter is at B-3. The Cutters will chase you, but you can lose them by going through a door or shortcut.
You can get useful items from the box at C-5. Leave a thread in the box and then check the box after 1 day. Sometimes you get a Nectar or Therica, sometimes you get nothing. However, the best result is getting the TP (Technique Points) restoring Amrita. You can slowly farm Amritas by using the box.
A secret passage at B-4 leads to a treasure box, Main Gauche, and a take point which you need to complete the pub request Culantro, please. The stairs to F2 are at D-6.
F2
Monsters: Ghost Owl, at night. FOE: Cutter. Materials: Sturdy Timber, Teak Wood. Treasure: Aim Hammer B-2, Macana B-4, Arm Hammer E-2.
Once you reach the second floor you will need to return to town to get a new mission from the Count. After accepting the mission you can finish exploring F2.
F2 is filled with even more of the same Cutter FOE's from F1. Many of them are waiting in alcoves, which you can avoid by walking behind.
The stairs to F3 are blocked by the Bloodbear at C-2.
Bloodbear (Mini-Boss)
The Game's first mini-boss, uses a bunch of physical attacks and a powerful charging-up move. Useful skills in this fight are L, power-break, N, Sand-throw, S, Arm-bind, D, Attack and Guard Tango. Save your burst skills until it starts charging-up and then use double slash along with lots of other attacks to make the bear flinch, canceling his attack. The bear flees down the stairs after getting low on health. Go back to town to rest and then proceed to F3.
F3
Monsters: Fanged Vine, Jig Lizard. FOE: Bloodbear. Materials: Granite, Cyanite. Treasure: Critical Hammer E-2, Hamao II E-2, Amrita D-3.
Upon entering F3 you must fight the Bloodbear again and defeat it; it will use all the same attacks but will only have half its health. F3 is filled with other Bloodbears who act like normal FOE's. Like the Cutters, the Bloodbears will chase you and destroy any branches you lead them to. You can lose the Bloodbears by going through a door or shortcut. A secret passage at F2 has two treasure boxes inside. You can get the Critical Hammer now, but you won't get the key to the locked chest until near the end of the game.
Your goal on F3 is to reach the center of the map, D-4, where the boss waits. After reaching the boss chamber explore the east side of the room to find shortcuts. The shortcuts will enable you to sneak behind the boss and avoid the other FOE's.
Berserker King (Boss)
Level recommendation 15-20. The first major boss of the game, similar to the Blood Bear but has a lot more health. Like the Blood Bear this boss also has a powerful charging-up attack that you can block with double slash and a lot of hits. The boss has no particular weaknesses so be prepared for a long fight. After beating the boss check the altar and then report back to the Count. Fly your skyship north of the Lush Woodlands to reach the second land, the Scarlet Pillars.
=== Scarlet Pillars ===
Activate the geomatic pole and then fly north, to A-3, to find a minor dungeon, Miasma Forest, you must explore.
Miasma Forest
Monsters: Great Lynx, Forest Hare, Trip Mushroom. FOE: Greedy Lizard. Materials: Osmunda Frond, Monks Cress, Lazurite, Night Shard. Treasure: Zoologics A-1.
Due to them patrolling in a tight square the Greedy Lizard FOE's here are hard to avoid, but it is possible due to them pausing after every move. It is best to just try to beat them if you can. Their poison attacks can be countered with a D's Refresh Dance or M's Refresh LV3. The lizards are weak to ice.
Your objective in the Miasma Forest is to reach the mining point on the north side, A-2, and gather a Night Shard. The center chamber of the dungeon is filled with foul gas that forces you to go back to the last room you exited if you take 10 or more steps. First head to the south room to catch your breath. Then go back into the center chamber and move to the southeast door. From the southeast unlock the shortcut in the northeast of the center room, at A-2. Go back to the west side and use the shortcut to reach the northeast room. Get a Night Shard from the mine point at A-2 and then go back to town.
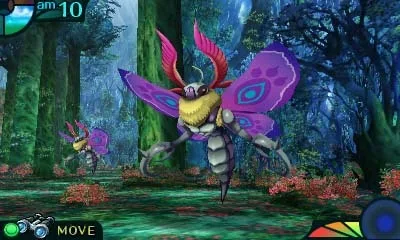
The Night Shard enables your skyship to ascend to a higher plane, making new areas available for exploring. You can access a new minor dungeon, back in the Windy Plains, the Dense Bushland at C-1. You can also now reach all dungeons in the Scarlet Pillars. The Moth's Garden at C-1 is guarded by a Dingator. To get past the Dingator, drop a mushroom type food to lure the nearby sheep 1 extra step south of its patrol zone. The Dinogator will proceed to eat the sheep, giving you time to reach the dungeon it guards. To get past the Omnihunter, guarding the northwe
100% Human-Written. AI Fact-Checked. Community Verified. Learn how AntMag verifies content