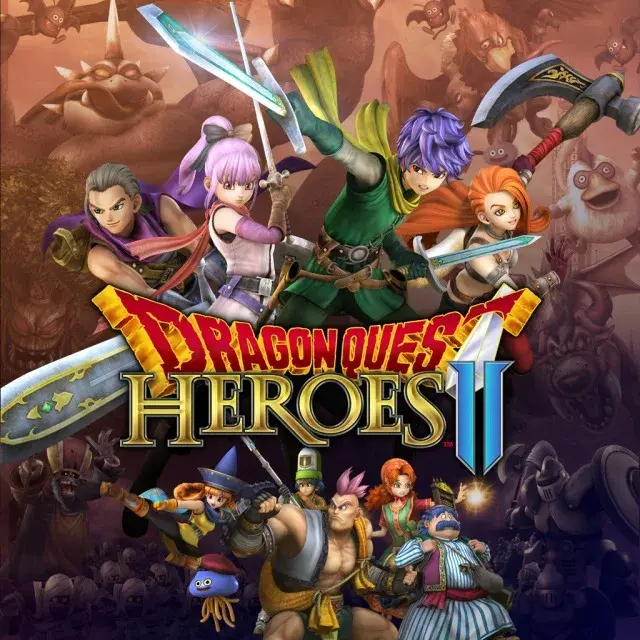
Welcome to the AntMag.NET guide for Dragon Quest Heroes! Developed by Omega Force and published by Square Enix, this 2017 action RPG blends the beloved Dragon Quest universe with Dynasty Warriors-style combat. You’ll be hacking and slashing through massive hordes of iconic Dragon Quest monsters, from slimes to drackys, using a variety of characters, each with their own unique skills and spells. It’s a fantastic way to experience the Dragon Quest world if you enjoy fast-paced action and strategic crowd control.
This guide is here to help you conquer every challenge Dragon Quest Heroes throws your way. We'll cover essential gameplay mechanics, character strategies, and key objectives to ensure you can master combat, optimize your farming techniques, and effectively progress your characters. Whether you're aiming to defeat fearsome bosses like the Metal King Slime or simply want to complete every quest and unlock all the Steam Achievements, we've got you covered. Get ready to save the world!
1-0. Introduction: Captain's Commencement
Begin your Dragon Quest Heroes adventure! Learn about character choices like Luceus and Aurora, their unique attacks, and what to expect from the game's missions and content.
Hey there! Before you dive headfirst into the world of Dragon Quest Heroes, let's get you prepped. If you're on PC, you might want to check out some controller files online – this game is definitely a smoother ride with a controller rather than a mouse and keyboard. Trust me on this one!
Now, about the missions and side quests: most of them are pretty straightforward. You'll spend a lot of time clearing out enemies from an area. The real meat of the game comes from collecting all the extra items and tackling the post-game content. The main story missions usually make it pretty clear what you need to do, but if you ever get stuck, don't sweat it. Sometimes, you just need to level up your characters or their gear. For more specific strategies, you'll want to check out the reference lists later on. Also, since this game is packed with characters from all over the Dragon Quest universe, everyone has their favorites. I can't really tell you who to pick for every mission because it's all about your personal preference, but I'll give you my recommendation.
When you first start, you'll get to pick between two characters who play pretty much the same: Luceus, the guy in blue, and Aurora, the lady in red. Luceus is all about fiery attacks, while Aurora uses ice to freeze your enemies. Personally, I lean towards Aurora because being able to immobilize your foes is a super useful trick. I'll be writing this guide with Aurora in mind, but if you choose Luceus, just picture his fire attacks whenever I mention Aurora's ice moves at the beginning.
Luceus: Flaming Fencer
This guy's a talented tactician who loves dishing out fast-paced fire attacks. His impressive speed and reach make him a solid choice in any fight. His Inferno Slash attack is awesome for clearing out big groups of enemies – it creates a fiery cyclone that takes down swathes of foes!
Aurora: The Elegant Ice Queen
Aurora is a spirited soldier with a knack for fast-paced ice attacks. Just like Luceus, she's got great speed and reach, making her a valuable asset. Her signature move, Cold Fission, unleashes a freezing whirlwind that can take out tons of enemies at once. Definitely aim it at those big crowds!
1-1. Chapter I: Arban Arms
Complete walkthrough for Chapter I: Arban Arms in Dragon Quest Heroes, covering combat, objectives, and boss strategies to save King Healix.
- 1Save the King! Follow Healix's tutorial instructions: open your action list, use a power, and jump over obstacles. Learn blocking and dodging (dodging is generally faster). To loot a chest, stand still in front of it and press the jump button.
- 2Starting Moves:
- X X X X: Slash Combo
- 3Y: Charging Slash
- 4X Y: Rising Slice
- 5X X Y: Swiping Slice (can stun)
- 6X X X Y: Blizzard Slash (chills foes)
- 7In Mid-Air: X X: Mid-Air Combo
- 8In Mid-Air: Y (Hold): Air Raid
- 9RB (Hold) and X: Cold Fission
- 10Combat Tips: Ending normal combos with a strong attack can stun targets (two normals + strong) or launch enemies (normal + strong). Mid-air normal attacks deal extra damage. Holding the mid-air strong attack acts like a sawblade. Activate special powers by holding RB and selecting from the menu.
- 11Secure the Throne Room (_Defeat all the monsters!_): Attack all monsters. Pick up small tan pouches for crafting. Use this section to practice strong attack finishers and special moves like Cold Fission/Inferno Slash.
- 12Big Trouble for Little Healix (_Don't let Healix get hurt!_): This is a protection mission. Race past monsters to Healix rather than fighting everything. Monitor Healix's HP bar beneath the map.
- 13A Powerful Enemy Appears! (_Defeat the dragon!_): The green dragon's first attack is flame breath. Stay back initially and attack minions instead. Loot nearby vases for supplies. Healix will heal critically wounded characters. Once minions are defeated, focus on the dragon's tail or head for bonus damage.
- 14High Tension Mode: After defeating the dragon, you gain High Tension mode. You are invincible, faster, and can double-jump. You can manually activate a coup de grâce to end the mode and perform a powerful area attack. Alternatively, let High Tension expire, and a coup de grâce will activate automatically.
- It is generally faster to dodge than to block attacks.
- When looting a chest, stand completely still before pressing the jump button.
- Consider ending normal attack strings with a strong attack for enhanced effects like stunning or launching enemies.
- In protection missions, prioritize reaching the protected character quickly rather than engaging every enemy.
- During the dragon boss fight, focus on minions first, then attack the dragon's tail or head.
- High Tension mode is useful for clearing large groups of enemies or stunning bosses, and all abilities consume no MP while active.
1-2. Chapter II: Caliburghian Creativity
Navigate Chapter II of Dragon Quest Heroes: The World Tree's Woe and the Blight Below. Learn about skill point allocation, new mechanics like Evac and Mawkeepers, and strategies for missions like 'Across the Meadows' and 'An Irreplaceable Invention'.
This section covers Chapter II of Dragon Quest Heroes, focusing on the city of Caliburgh and its associated missions. It provides guidance on character progression, combat mechanics, and specific quest objectives.
- 1Caliburghian Creativity - Skill Point Allocation:
- Maximum HP: Not recommended for leveling.
- 2Maximum MP: Marginally useful, but Attack/Wisdom are better.
- 3Strength/Attack: The best attribute; focus on this.
- 4Defence/Resilience: Consider if other attributes are maxed.
- 5Magical Might/Wisdom: Useful for specific attacks.
- 6Deftness: Increases critical hits; a great attribute to focus on.
- 7Across the Meadows:
- Objective: Defeat all monsters.
- 8Mechanic: Evac is introduced. Use it from the menu to return to safety without penalty. If defeated, you lose items picked up during the battle.
- 9Mawkeepers: These monsters guard Nightmaws (portals) that spawn additional monsters. Defeating Mawkeepers stops the continuous spawning.
- 10Monster Spawns: Limited except during free roaming stages. Nightmaws eventually stop summoning.
- 11End of Battle: Remaining monsters flee; defeat them for extra rewards.
- 12Guided by Genius:
- Objective: Defeat all monsters.
- 13Narrative: Heroes are harassed by monsters en route to Caliburgh.
- 14New Mechanic: A new friend appears, introducing the Spellcaster turret.
- 15Objective: Remove all Mawkeepers to stop Nightmaw spawns.
- 16Turret Section: Man the Spellcaster turret to eliminate hard-to-reach enemies.
- 17Reward: Ability to control any deployed squad member.
- 18Doric: The Royal Rumbler:
- A weighty warrior king with high strength and speed.
- 19Notable Skill: Crushed Ice - a series of snowy strikes.
- 20Isla: The Long-Range Lassie:
- A fighter who uses a boomerang for ranged attacks.
- 21Special Attack: Triggered by pressing X or Y when catching the boomerang.
- 22Notable Skill: Woosh - creates a whirlwind that can be combined with other attacks.
- 23An Irreplaceable Invention:
- Objective: Protect the Generator.
- 24New Ally: Isla, head of the Institute of Ingenuity, joins the party.
- 25Party Allocation: Allocate skill points to party members. Isla's Power Throw and Doric's Deliverance are recommended.
- 26Yggdrasil Leaves: Replenished on battlefield arrival; used to revive fallen characters. Knocked-out characters do not gain XP.
- 27Generator Protection: Keep fights away from the Generator to prevent collateral damage.
- 28Monster Compressor: Isla's prototype allows deployment of sentries and special monster powers using medals.
- 29Summoned Monsters: Sentries hold areas; Saviours use one ability and disappear.
- 30The Irrepressible Horde:
- Objective: Protect the Generator again.
- 31New Ally: Aurora gains the ability to use monster medals.
- 32Monster Medals: Summoned monsters help fend off foes.
- 33Strategy: Place summoned monsters a short distance away from the Generator to delay enemy progress effectively.
- 34Mawkeeper Priority: Attacking Mawkeepers is generally efficient.
- 35Evac Strategy: In heavily monster-flooded missions, consider fighting all-out for XP/items, but remember to Evac before defeat to avoid mission failure penalties.
- Prioritize Strength/Attack and Deftness for character builds.
- Use the Evac function liberally to avoid losing items upon defeat.
- Focus on eliminating Mawkeepers to control monster spawns.
- Protect the Generator by keeping enemies away from it and strategically deploying summoned monsters.
- Experiment with character skills like Isla's Power Throw and Doric's Deliverance.
1-3. Chapter III: Colissean Champions
Master Chapter III of Dragon Quest Heroes with our guide to Colissean Champions. Learn strategies for defending gates, protecting the Mayor, and defeating arena monsters.
- 1Across the Shifting Sands: Defend the gates. Alena and Kiryl join the party. Travel via the airship Stonecloud. Beware of quicksand, which slows movement; Fishnet Stockings offer no significant advantage.
- 2Meeting the Mayor: Protect the Mayor at the water fountain. Monsters attack the gates of Colissea. Defend the mayor by pushing back monster waves, using coup de grâce attacks and special abilities. Prioritize taking down mawkeepers once the mayor's area is secure. The mayor rewards the party with Healstones, which function like carry-able medicinal herbs that cost gold to restock.
- 3Colissea's Leafy Lifeline: Defend the World Tree root in the eastern district and arena. This mission serves to prepare players for upcoming plot developments.
- 4The Arena of Conflict: Defeat three metal monstrosities in the arena. Use the Zap spell to stun them, making them vulnerable. Time stuns to interrupt powerful attacks, especially when they glow pink. Break vases for pick-me-ups.
- Ensure at least one character can learn the Zap spell before the arena battle, as it's effective for stunning mechanical enemies.
- If your main character doesn't have Zap, bring a secondary knight captain who does.
- Spend skill points before the arena battle.
- Check vases in the arena for items.
- After clearing the arena, speak with the Clerk of Works and Questmistress.
- Consider running quests like "Greedy for Ingredients 1" and "Improving on Perfection 1." All quests are eventually accessible.
- Spend mini medals at King Flaminio for upgrades. Consider purchasing the recipe for the mugger's mask if you have the required ingredients (3x snakeskin, 2x slipweed) or are willing to pay mini medals.
- "Greedy for Ingredients 1" requires three grubby bandages to increase ingredient carrying capacity.
- "Improving on Perfection 1" requires three lumps of iron ore to increase monster minion slots.
Similar guides you might like


100% Human-Written. AI Fact-Checked. Community Verified. Learn how AntMag verifies content