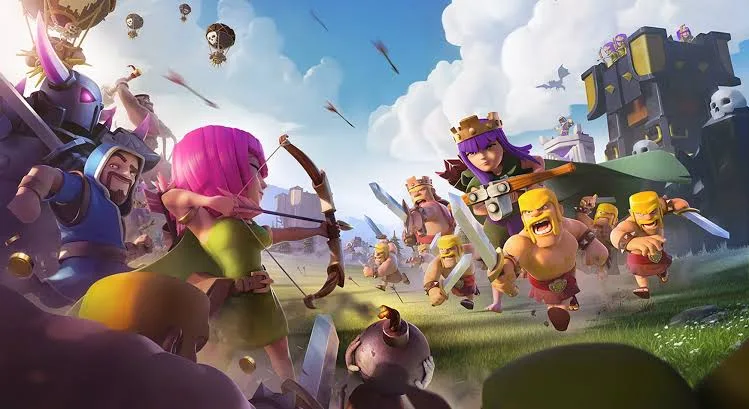
Welcome to Clash of Clans, the ultimate mobile strategy game where you build your own village, train an army of powerful troops like Dragons and Wizards, and battle other players to become the ultimate warlord. Master the art of village building and strategic warfare, deploying your forces and devastating enemy bases with cunning tactics and powerful Traps. It's a constant cycle of building, training, and destroying, all in pursuit of glory and resources.
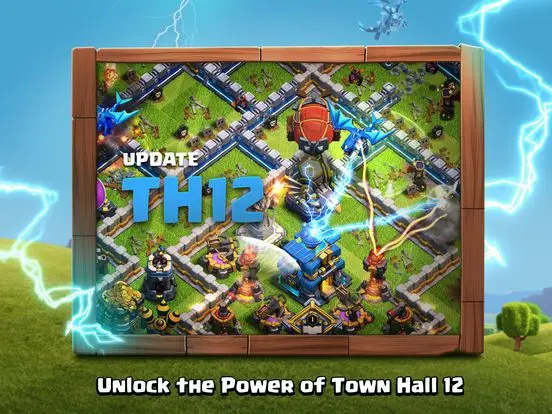
This guide dives deep into the core mechanics of Clash of Clans, focusing on crucial elements that can make or break your success. We'll cover everything from efficient gem management and troop deployment strategies to advanced tactics for the Builder Base. Plus, we'll help you navigate the exciting new Hero Equipment feature introduced in the December 2023 update, ensuring your heroes are ready to lead your army to victory, even with the new Town Hall 16 challenges.
Town Hall 3: Introducing Spells and Giants
Learn how to effectively use Spells and Giants at Town Hall 3 in Clash of Clans. This guide provides essential strategies and tips to dominate your opponents and advance your village.
Town Hall 3: Introducing Spells and Giants
Learn how to effectively use Spells and Giants at Town Hall 3 in Clash of Clans. This guide provides essential strategies and tips to dominate your opponents and advance your village.
Mortar and Air Defense Placement
Learn the best strategies for placing Mortars and Air Defenses in Clash of Clans to maximize your base's protection and defend against enemy attacks effectively.
Hey there, Chief! So you're looking to get the most out of your Mortars and Air Defenses in Clash of Clans, huh? That's a smart move! These guys are your backbone for keeping your village safe. Let's break down how to place them like a pro.
Think of your Mortars as your splash damage specialists. They lob those shells from a distance, hitting groups of ground troops. Because they're so good at taking down swarms, you want to position them where they can cover as much of your base as possible, especially areas where ground attackers are likely to enter. However, they can't hit air troops, so don't rely on them for air defense!
Now, Air Defenses are your absolute must-have against anything that flies. Dragons, Balloons, Minions – they're all in trouble when an Air Defense locks on. The trick here is placement. You want them deep inside your base, protected by other buildings. If an attacker can snipe your Air Defenses early with a few troops or spells, your whole air game can fall apart. Spreading them out a bit can also be good, so an attacker can't take out multiple with one sneaky attack.
When you're setting up your base, try to create a bit of a triangle or a square with your Air Defenses, keeping them a good distance from the edge of your base. This forces attackers to commit more resources to get to them. For Mortars, you can often place them a bit further out, but still where they can hit incoming ground waves before they reach your core defenses. Remember, it's all about layering your defenses and making attackers choose between taking out your key defenses or your resource buildings.
Don't forget to upgrade these bad boys as often as you can! Higher-level Mortars hit harder and Air Defenses have more health and deal more damage. Happy Clashing!
Balloon Attacks and Spring Traps
Elevate your Clash of Clans offense with Balloon attacks and defensive strategy using Spring Traps. Master air attacks and trick enemy troops.
Balloon Attacks and Spring Traps: Mastering Air Offense and Defensive Deception
Welcome, Chief! This section delves into two critical elements of Clash of Clans strategy: the devastating power of Balloon attacks and the cunning defensive utility of Spring Traps. Mastering these will significantly elevate your offensive prowess and defensive resilience.
The Mighty Balloon: A Guide to Air Supremacy
Balloons are unlocked at Town Hall 4 and are the first dedicated air-to-ground offensive unit you encounter. While slow, their high damage output and exclusive targeting of defenses make them a cornerstone of many powerful attack strategies, especially at higher Town Hall levels.
Balloon Fundamentals:
- Primary Target: Defenses (Cannons, Archer Towers, Mortars, Wizard Towers, Air Defenses, X-Bows, Inferno Towers, Eagle Artilleries, Scattershots, Monoliths).
- Damage Type: Area Splash (upon impact with a defense).
- Movement Speed: Very Slow.
- Housing Space: 5.
- Strengths: High damage per second (DPS) against defenses, ignores walls, effective in large groups.
- Weaknesses: Extremely vulnerable to Air Defenses, Wizard Towers, and Seeking Air Mines. Slow movement makes them susceptible to time-outs.
Common Balloon Attack Strategies:
Balloons rarely operate alone. Their slow speed and vulnerability necessitate support from other troops and spells. Here are some popular combinations:
1. Mass Balloons (TH4-TH7):
At lower Town Hall levels, simply training a large number of Balloons can overwhelm defenses, especially if Air Defenses are poorly placed or under-leveled. This strategy is straightforward but becomes less viable as base layouts become more sophisticated.
- Army Composition: 20-30 Balloons (depending on camp space).
- Spell Support:
- Rage Spell (TH7+): Crucial for increasing Balloon speed and damage, allowing them to quickly destroy clusters of defenses.
- Healing Spell (TH6+): Can provide a brief burst of health, but Rage is generally preferred for Balloons due to their high health and the need for speed.
- Deployment: Deploy Balloons in a wide line to cover a broad area, targeting Air Defenses first if possible.
2. LavaLoon (Lava Hound + Balloons) (TH9+):
This is one of the most iconic and powerful air attack strategies in Clash of Clans. Lava Hounds act as 'tanks' for Balloons, absorbing damage from Air Defenses while Balloons destroy everything in their path.
- Army Composition: 2-4 Lava Hounds, 20-30 Balloons, 5-10 Minions (for cleanup).
- Spell Support:
- Rage Spell: Essential for speeding up Balloons and increasing their damage.
- Haste Spell (TH9+): Provides a significant speed boost without the damage increase of Rage, excellent for quickly traversing large sections of the base or getting to key defenses.
- Freeze Spell (TH10+): Used to temporarily disable high-damage defenses like Inferno Towers or Eagle Artilleries.
- Poison Spell: For enemy Clan Castle troops.
- Deployment Sequence:
- Lava Hound Deployment: Deploy Lava Hounds to tank Air Defenses. Aim for 1-2 Hounds per Air Defense.
- Balloon Deployment: Immediately follow with Balloons, deploying them in a wide arc behind the Lava Hounds. Ensure they are targeting the defenses being tanked.
- Spell Placement: Use Rage and Haste spells to push Balloons through high-damage areas, especially around Wizard Towers and multiple Air Defenses. Freeze critical defenses as needed.
- Minion Cleanup: Once defenses are down, deploy Minions to clear remaining structures.
3. ElectroLoon (Electro Dragon + Balloons) (TH11+):
A powerful, albeit expensive, strategy leveraging the chain lightning of Electro Dragons to clear paths for Balloons.
- Army Composition: 4-6 Electro Dragons, 10-15 Balloons, 1-2 Lava Hounds (optional, for tanking).
- Spell Support: Rage, Freeze, Clone (optional, for Electro Dragons).
- Deployment: Use Electro Dragons to create a funnel and destroy key defenses, then send in Balloons with Rage and Freeze support.
Tips for Successful Balloon Attacks:
- Scout Thoroughly: Identify the location of Air Defenses, Wizard Towers, and Sweepers. Plan your attack path to minimize exposure to these threats.
- Funneling: While not as critical as with ground troops, using a few Balloons or even a Hero to clear peripheral buildings can help guide your main Balloon force.
- Spell Timing: Proper spell placement is paramount. A well-timed Rage or Haste can save dozens of Balloons.
- Clan Castle Troops: Always lure and deal with enemy Clan Castle troops, especially if they are air-targeting (Wizards, Archers, Dragons). A Poison Spell is your best friend here.
- Hero Support: The Grand Warden's Eternal Tome ability (TH11+) is invaluable for protecting Balloons during critical pushes. The Archer Queen can help with funneling or clearing ground-based threats.
The Deceptive Spring Trap: Launching Ground Threats
Spring Traps are a defensive building unlocked at Town Hall 4. They are invisible to attacking troops until triggered, and their sole purpose is to launch a certain number of ground troops away from your base, effectively removing them from the battle.
Spring Trap Mechanics:
- Trigger: When a ground troop walks over it.
- Effect: Launches a fixed number of troops (up to their housing space capacity) away from the base, removing them from the battle.
- Housing Space Capacity: Varies by level (e.g., Level 1: 15 housing space, Level 5: 20 housing space).
- Targeting: Only affects ground troops. Heroes and Golems are immune.
- Re-arm Cost: Free after each defense.
Strategic Spring Trap Placement:
The effectiveness of Spring Traps hinges entirely on their placement. A well-placed trap can devastate a ground attack, while a poorly placed one is a wasted defensive slot.
1. Between Defenses:
Troops often path between defenses. Placing Spring Traps in these narrow gaps forces troops to trigger them as they move from one target to the next. This is particularly effective against Hog Riders, Giants, and Miners.
- Example: Place a Spring Trap in the 1-tile gap between a Cannon and an Archer Tower.
2. Near Junctions of Walls:
When Wall Breakers open up a compartment, ground troops will often stream into the newly accessible area. Placing Spring Traps at these entry points can catch a large group.
- Example: Place a Spring Trap just inside a wall segment where troops are likely to enter after a wall is breached.
3. In Funnel Paths:
If you've designed your base to funnel troops into a specific area (e.g., towards a central defense or a bomb tower), place Spring Traps along these funnel paths to maximize their impact.
- Example: Create a 2-tile wide gap in your base's outer layer, leading troops towards a Spring Trap before they reach your core defenses.
4. Around Resource Buildings (for lower THs):
At lower Town Hall levels, attackers often go for resource buildings. Placing traps around these can catch early waves of Goblins or Barbarians.
5. Against Specific Troop Types:
- Hog Riders: These troops jump over walls and often path in tight groups. Placing Spring Traps in the 1-tile gaps between defenses is incredibly effective against them.
- Giants: Similar to Hog Riders, Giants clump together. Traps in defensive pathways are ideal.
- Miners: Miners surface in predictable patterns. Place traps where they are likely to emerge after tunneling.
- Valkyries: Valkyries move very quickly and often path between buildings. Traps in narrow corridors can be devastating.
Common Pitfalls to Avoid:
- Placing in Open Areas: Spring Traps are easily avoided in wide-open spaces. They need to be in constrained paths.
- Too Close to Walls: If a Spring Trap is directly adjacent to a wall, troops might walk around it rather than over it, or Wall Breakers might destroy the wall before troops trigger the trap. Leave a small gap.
- Predictable Patterns: Don't place all your Spring Traps in identical spots. Vary their placement to surprise attackers.
- Ignoring Troop Pathing: Always consider how different troop types will path through your base. Test your layouts by attacking them yourself or watching replays.
By understanding the strengths and weaknesses of Balloons and strategically deploying your Spring Traps, you'll be well on your way to becoming a Clash of Clans master!
Giants and Healing Spells — Clash of Clans Guide
Learn the Giant Healer attack strategy for Clash of Clans Town Hall levels 6 and 7. Perfect for trophy pushing between 800-1500 trophies. Get your Giants and Healers ready!
The Giant Healer Strategy (TH 6-7)
This strategy is pretty straightforward and can be super effective when you get the hang of it. It's all about using your Giants as tanks while your Healers keep them alive, and then cleaning up with your Wizards and Archers.
#### Army Composition
You'll need a good mix of troops and spells. Here’s a solid setup to aim for:
- Archers: 15 (Level 3 recommended)
- Giants: 17 (Level 3 recommended)
- Wizards: 9 (Level 3 recommended)
- Healers: 1 (Any level will do)
- Healing Spells: 2 (Level 3 recommended)
This setup uses about 150 troop housing space and 4 spell housing space. Make sure your Giants and Wizards are at least Level 3 for this to be most effective.
#### Execution: Step-by-Step
Alright, here's how to pull off the attack:
- Scout the Base: Look for a base with only one Air Defense. If it's upgrading, even better! The key is to find an Air Defense that's pretty exposed.
- Scout for CC Troops: Use one Archer to lure out any Clan Castle troops.
- Deal with CC Troops: If they come out, lure them to a corner. Then, use about half of your Wizards and Archers to take them down.
- Deploy Giants: Drop one Giant first and wait for a mortar shell to land. This helps you gauge the timing. Then, deploy the rest of your Giants, directing them towards the Air Defense.
- Deploy Healer: Once the Air Defense is down, deploy your Healer behind the Giants.
- Use Healing Spells: If your Giants start dropping below 3/4 health, don't hesitate to drop a Healing Spell on them.
- Deploy Support Troops: Once the defenses on one side of the village are mostly destroyed, send in your Archers and Wizards to clean up.
- Don't Forget the Corners: Remember to get those Builder's Huts in the corners for those extra trophies!
#### A Few Pitfalls to Watch Out For:
- Air Defense Placement: If the Air Defense is too deep or heavily protected by other defenses, this strategy might struggle.
- Clan Castle Troops: Strong CC troops like Dragons or Witches can be a real pain if you can't lure and defeat them effectively.
- Healer Pathing: Sometimes Healers can get distracted. Keep an eye on them!
#### Conclusion
This Giant Healer strategy is a fantastic way to boost your trophies at TH 6 and 7. Practice it, get a feel for the timing, and you'll see great results. Hope this helps you climb the ranks! Clash on!
Similar guides you might like


100% Human-Written. AI Fact-Checked. Community Verified. Learn how AntMag verifies content