Tips for selecting the optimal base location in 7 Days to Die, considering resources, terrain, and zombie activity.
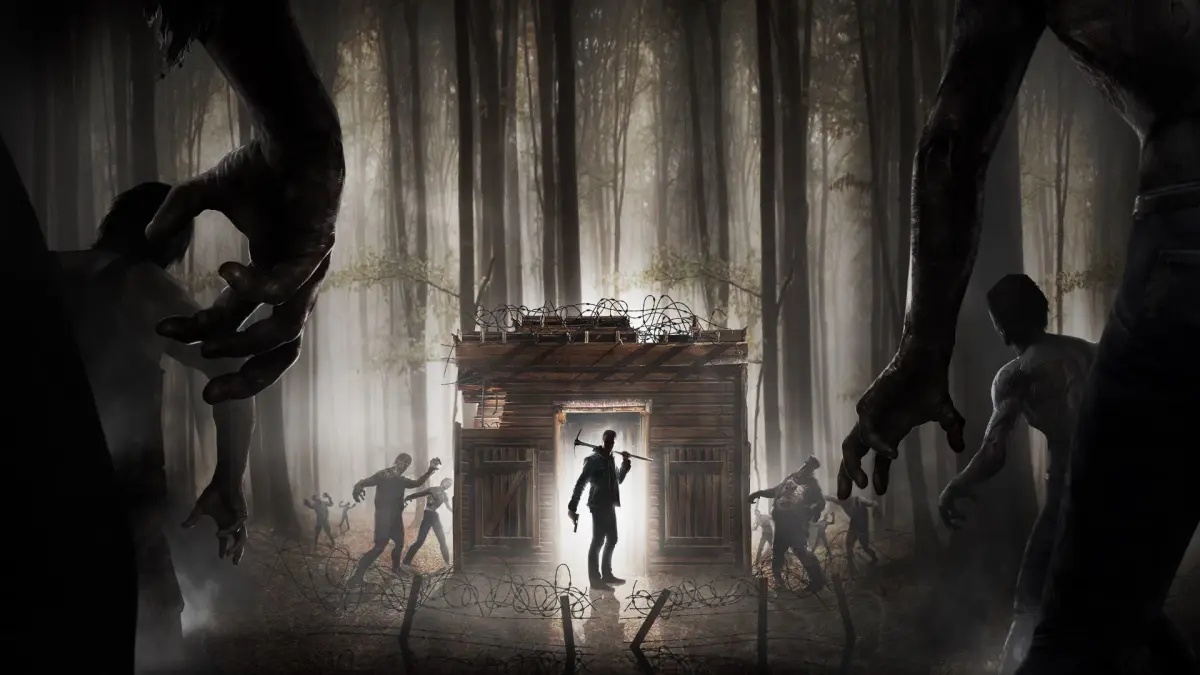
Selecting the ideal location for your primary base in 7 Days to Die is one of the most critical decisions you'll make, directly impacting your survival, resource acquisition, and overall game progression. A well-chosen spot provides security, convenience, and access to vital resources, while a poor one can lead to constant threats and logistical nightmares. This guide will walk you through the key considerations for establishing your sanctuary.
Initial Scouting and Planning
Before committing to any permanent construction, it's highly recommended to scout potential locations. Spend a few in-game days exploring the surrounding area, noting down points of interest, resource nodes, and potential threats. This reconnaissance phase is crucial for making an informed decision.
- Map Type: Consider whether you're playing on the pre-generated Navezgane map or a Randomly Generated map. Navezgane has fixed biomes and POIs, allowing for more predictable planning, while random maps require more extensive exploration.
- Early Game Safety: In the initial days, prioritize safety over perfect resource access. Avoid areas with high zombie density or known 'hot spots' like large cities, industrial zones, or hospitals. These locations, while rich in loot, are death traps for an unequipped survivor.
- Terrain Advantage: Look for natural defenses. High ground offers a tactical advantage against hordes, providing clear lines of sight and making it harder for zombies to reach you. Natural choke points, such as narrow canyons or river bends, can be exploited for defense.
- Proximity to Water: Beyond just desert biomes, access to a reliable water source is paramount. Rivers, lakes, or even small ponds provide an infinite supply of murky water, which can be boiled for drinking or used for farming. Early game, this reduces the need to craft or loot bottled water, freeing up inventory space and resources.
Biome Considerations
Each biome in 7 Days to Die offers unique advantages and disadvantages, influencing resource availability, climate challenges, and zombie types. Understanding these differences is key to choosing a location that suits your playstyle and current needs.
- Forest/Pine Forest:
- Pros: Abundant wood, stone, and animal spawns (deer, boar, rabbits). Moderate temperatures. Good starting biome for basic resources. Often features rivers or lakes for water access.
- Cons: Can feel generic; less access to specialized resources.
- Desert:
- Pros: Excellent source of Oil Shale (for gasoline), sand (for concrete), and yucca plants (food/water).
- Cons: Extreme heat during the day, requiring cooling measures (yucca juice, cooling vests). Fewer trees and water sources, making water management a higher priority. Vultures are common.
- Snow/Wasteland:
- Pros: Often less zombie activity in the snow biome due to cold, but this can vary. Wasteland offers high-tier loot from POIs.
- Cons: Extreme cold in snow biome, requiring warm clothing and campfires. Wasteland has very high zombie density, irradiated zombies, and harsh environmental effects. Not recommended for early-game bases.
- Burnt Forest:
- Pros: Good source of coal.
- Cons: Visually bleak, often has a higher concentration of charred zombies. Limited food and water sources.
- Plains:
- Pros: Flat terrain ideal for large-scale building. Good visibility. Often has good water access.
- Cons: Fewer natural defenses, can be exposed.
Points of Interest (POIs) for Base Location
While large cities are generally dangerous, certain smaller POIs can be excellent starting bases or offer strategic advantages. Consider these types:
- Good POIs to Convert:
- Small Houses/Cabins: Often have decent structural integrity, a few rooms for storage, and can be easily reinforced. Look for brick or concrete structures.
- Barns/Warehouses: Offer large open spaces for expansion, crafting stations, and vehicle storage. Their large footprint can be a challenge to defend, but their size is an asset for later game.
- Gas Stations: Provide a strong concrete foundation and often have a small office area. The pumps can be removed to create a defensible perimeter.
- Water Towers/Radio Towers: Building on top of these offers extreme height advantage, making it difficult for zombies to reach you. Requires significant structural reinforcement and a reliable way to ascend/descend.
- Underground Bunkers/Silos: Rare finds, but offer unparalleled protection from hordes and environmental threats.
- POIs to Avoid (for primary base):
- Hospitals/Police Stations/Large Apartment Buildings: These are zombie magnets, often containing special infected and high-tier loot, but are extremely difficult to clear and defend early on.
- Industrial Complexes/Factories: High zombie density, complex layouts, and often host powerful zombies.
- Caves/Mines (natural): While good for resources, natural caves can have multiple entrances, making them hard to secure. Zombie spawns can also occur within them.
Utilizing Natural Choke Points
Natural choke points are geographical features that funnel zombies into a narrow path, making them easier to defend against. Identifying and utilizing these can significantly reduce the resources needed for base defense.
- How to Identify:
- Canyons/Gorges: Narrow passages between high cliffs.
- River Bends/Islands: Water acts as a barrier, forcing zombies to cross at specific points or swim slowly.
- Hilltops/Plateaus: Elevated, flat areas with steep sides, limiting access to one or two ramps.
- Building Corners/Alleys: Even within urban environments, the corner of two large, indestructible buildings can create a natural funnel.
- How to Utilize:
- Block Off Alternative Paths: Use dirt, wood frames, or concrete to seal off any secondary access points, forcing all zombies into your chosen choke point.
- Create Kill Corridors: At the choke point, build a narrow corridor lined with traps (spikes, barbed wire, electric fences) and defensive blocks (iron bars, reinforced concrete).
- Elevated Firing Positions: Construct a platform above the choke point to safely shoot down at the funneled zombies.
- Explosives/Molotovs: These are highly effective against grouped zombies in a choke point.
Long-Term Considerations
While early game survival is key, a truly optimal base location also accounts for future expansion and resource needs.
- Proximity to Trader Outposts: This is paramount. Proximity to a Trader is strategically vital for questing, selling excess loot, buying essential schematics or rare items, and accessing their protected land claim block. Aim to be within reasonable walking or vehicle distance (e.g., 500-1000 meters) of a Trader. Quests are a primary source of Dukes, XP, and valuable rewards.
- Resource Veins:
- Mines: Look for areas with visible ore veins (iron, lead, nitrate, coal). Building near a mine reduces travel time for crucial crafting materials for mid to late-game tools, weapons, and ammunition.
- Clay/Sand Deposits: Essential for concrete and farming.
- Forests: Easy access to wood is always beneficial for early game crafting and fuel, and remains important for later game construction.
- Future Expansion: Consider if the chosen location has enough flat, open space for future additions like large farming plots, vehicle garages, or expanded defensive perimeters. An underground base offers virtually unlimited expansion potential.
- Road Access: Proximity to roads can make vehicle travel and resource hauling much more efficient.
Avoiding Danger Zones
Some areas are inherently more dangerous and should be avoided, especially in the early game.
- Cities and Urban Centers: These areas are teeming with zombies, including tougher variants, and are frequent spawn points for Screamers. While they offer rich loot, they are extremely hazardous for a fledgling survivor.
- Wasteland Biome: As mentioned, the Wasteland is the most dangerous biome, featuring irradiated zombies, high zombie density, and harsh environmental effects. It's best left for later game exploration with advanced gear.
- Known 'Hot Spots': Some areas, even outside major cities, can have consistently high zombie spawns or unique, dangerous POIs. Learn to recognize these during your scouting phase and give them a wide berth.
Building Considerations
Once you've narrowed down your location, think about the practicalities of building your base.
- Flat Ground: While not strictly necessary, flat ground simplifies construction, especially for larger bases or farming plots.
- Existing Structures: Converting an existing structure (e.g., a sturdy brick house, a small bunker) can save significant time and resources compared to building from scratch. Look for structures with strong foundations and easily defensible entry points.
- Underground Potential: Building an underground base offers excellent protection from hordes and environmental hazards. Look for areas with suitable terrain for digging, preferably not directly above a cave system that could be breached.
By carefully considering these factors and taking the time to scout thoroughly, you can establish a secure and efficient base that will serve you well throughout your survival in 7 Days to Die.
100% Human-Written. AI Fact-Checked. Community Verified. Learn how AntMag verifies content