
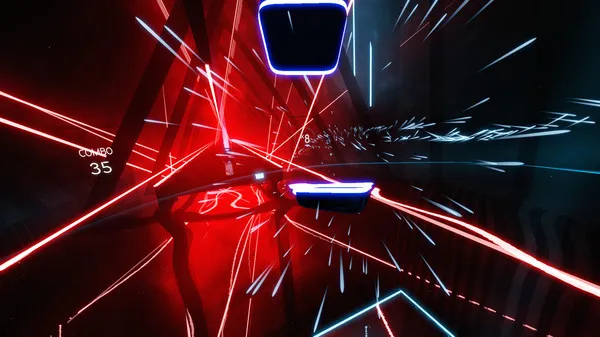
Welcome to Guitar Hero World Tour! This 2008 rhythm game from Neversoft lets you shred on guitar, pound the drums, and sing your heart out. You'll master iconic tracks like 'Sweet Home Alabama,' create your own custom rocker, and progress through a career mode across multiple platforms including PC, Xbox 360, PS3, PS2, and Wii.
This guide is here to help you conquer every riff and drum solo. We'll cover the essentials to get you started, from understanding the game's mechanics to achieving success in challenging songs and modes. Whether you're aiming for that perfect score or just want to enjoy the full experience, we've got the tips you need.
Part 1
Detailed guitar tab guide for 'Through the Fire and Flames' in Guitar Hero World Tour, covering Easy, Medium, Hard, and Expert difficulties. Learn the hardest song in the game!
This guide provides guitar tablature for the song "Through the Fire and Flames" in Guitar Hero: Greatest Hits/Smash Hits. The song is known as the hardest in the game and is playable on guitar, bass, or drums. This guide focuses on guitar tabs for various difficulties.
Song Information:
- Artist: Dragonforce
- Song Length: 7 mins 19 secs
- Year: 2006
- Original Game: Guitar Hero III: Legend of Rock
- Venue: Quebec City
- Exportable to GH5/BH: No
Version History:
- Version 0.00 (01/05/2010): Guide started.
- Version 0.50 (08/05/2010): Hard and Expert difficulties finished. Easy and Medium may be added later.
Copyright Notice:
This guide is protected by copyright. Copying or distribution without explicit permission and proper credit is strictly prohibited and will result in severe consequences. Permission and credit are both required for any use.
Tabs Section:
The tabs are broken down by difficulty and include a layout explanation and key.
Layout Explanation:
Each tab section represents a bar of music. The letters on the left (G, R, Y, B, O) correspond to the guitar frets (Green, Red, Yellow, Blue, Orange). Numbers above the lines indicate beats, with '+' denoting notes between beats. Dashes represent rests, and notes replace dashes in their correct positions. The availability of fret colors in the tabs depends on the difficulty:
- Easy: Blue and Orange are excluded.
- Medium: Orange is excluded.
- Hard and Expert: All five colors are included.
Key:
The key will define the specific notation used for the tabs, which is standard guitar tablature format.
Difficulties Covered:
- Easy (May be added later)
- Medium (May be added later)
- Hard
- Expert
Closing and Credits:
The guide concludes with a closing section and credits for those involved.
Part 2
Detailed breakdown of the 'Hard' difficulty guitar tab for Part 2 of Guitar Hero World Tour, including note explanations and song sections like Prelude A, Prelude B, Through the Fire A, and Through the Fire B.
This section details the 'Hard' difficulty guitar tab for Part 2 of Guitar Hero World Tour. The tabs represent musical notation where each row corresponds to a guitar string (G, R, Y, B, O) and each column represents a beat within a measure. The numbers at the bottom (1 + 2 + 3 + 4 +) indicate the timing within the song.
Key to Notes:
- O = A normal note.
- o = A hammer-on/pull-off. Strumming is not required if the previous note was hit correctly.
- # = A keyboard note. These do not require strumming and can be played using the touch strip.
- O++++++ = A sustained note. Play the note and continue holding the fret. The pluses indicate the duration.
- O* = A star note. Playing a sequence of star notes fills the Star Power meter. If a sustained note is a star note, the first plus will be an asterisk. If multiple consecutive notes are star notes, only the last one may be marked with an asterisk.
Hard Difficulty Tab:
Total notes: 2723
Prelude A
G|----------------|----------#---#-|----------------|----------#---#-|
R|#-----#---------|------#-----#---|#-----#---------|------#-----#---|
Y|--#-----#-------|--#-----#-------|--#-----#-------|--#-----#-------|
B|----#-----#---#-|----#-----------|----#-----#---#-|----#-----------|
O|------------#---|#---------------|------------#---|#---------------|
1 + 2 + 3 + 4 + 1 + 2 + 3 + 4 + 1 + 2 + 3 + 4 + 1 + 2 + 3 + 4 +
G|----------------|----------#---#-|----------------|----------#*--#*|
R|#-----#---------|------#-----#---|#-----#---------|------#*----#*--|
Y|--#-----#-------|--#-----#-------|--#-----#-------|--#-----#*------|
B|----#-----#---#-|----#-----------|----#-----#---#-|----#*----------|
O|------------#---|#---------------|------------#---|#---------------|
1 + 2 + 3 + 4 + 1 + 2 + 3 + 4 + 1 + 2 + 3 + 4 + 1 + 2 + 3 + 4 +
Prelude B
G|----------------|----------#---#-|----------------|---------------o|
R|#*----#---------|------#-----#---|#-----#---------|----o---o----o--|
Y|--#-----#-------|--#-----#-------|--#-----#-------|---o-o---o--o---|
B|----#-----#---#-|----#-----------|----#-----#---#-|-o-----o---o----|
O|------------#---|#---------------|------------#---|o---------------|
1 + 2 + 3 + 4 + 1 + 2 + 3 + 4 + 1 + 2 + 3 + 4 + 1 + 2 + 3 + 4 +
Through the Fire A
G|----O-----O---O-|----O-----O---O-|----O-----O---O-|----O-----O---O-|
R|----------------|----------------|----------------|----------------|
Y|o-O---O-O---O---|O-O---O-O---O---|----------------|----------------|
B|----------------|----------------|----------------|----------------|
O|----------------|----------------|O-O---O-O---O---|O-O---O-O---O-|
1 + 2 + 3 + 4 + 1 + 2 + 3 + 4 + 1 + 2 + 3 + 4 + 1 + 2 + 3 + 4 +
G|----O-----O---O-|----O-----O---O-|----O-----O---O-|----------------|
R|----------------|----------------|----------------|o---------------|
Y|----------------|----------------|O-O---O-O---O---|-o----------o+++|
B|O-O---O-O---O---|O-O---O-O---O---|----------------|---o--o---o-----|
O|----------------|----------------|----------------|----o---o-------|
1 + 2 + 3 + 4 + 1 + 2 + 3 + 4 + 1 + 2 + 3 + 4 + 1 + 2 + 3 + 4 +
Through the Fire B
G|----O*----O*--O*|----O-----O---O-|----O-----O---O-|----O-----O---O-|
R|----------------|----------------|----------------|----------------|
Y|O*O*--O*O*--O*--|O*O---O-O---O---|----------------|----------------|
B|----------------|----------------|----------------|----------------|
O|----------------|----------------|O-O---O-O---O---|O-O---O-O---O-|
1 + 2 + 3 + 4 + 1 + 2 + 3 + 4 + 1 + 2 + 3 + 4 + 1 + 2 + 3 + 4 +
G|----O-----O---O-|----O-----O---O-|----o-------o---|-o---------------|
R|----------------|----------------|---o-o-----o-o--|----------------|
Y|----------------|----------------|-o-----o-o------|----------------|
B|O-O---O-O---O---|O-O---O-O---O---|O-------o------o+++++++++++++++++|
O|----------------|----------------|----------------|----------------|
1 + 2 + 3 + 4 + 1 + 2 + 3 + 4 + 1 + 2 + 3 + 4 + 1 + 2 + 3 + 4 +
Part 3
Conquer Part 3 of Guitar Hero World Tour! This guide breaks down the tricky sections, helping you nail every note and achieve a high score. Let's rock!
Alright, let's dive into Part 3 of Guitar Hero World Tour. This section is where things start to get a bit more complex, so pay close attention to the patterns. We'll break down the tricky bits so you can get through it without missing a beat.
- 1Verse 1A: You'll start off with a relatively straightforward pattern. Focus on hitting the Green, Red, Yellow, Blue, and Orange notes as they appear. The key here is to get into a good rhythm.
- 2Verse 1B: This part introduces some quicker note sequences. Keep your eyes on the highway and try to anticipate the upcoming notes. Don't get discouraged if you miss a few; just reset your focus for the next section.
- 3Verse 1C: Things speed up even more here. You'll see a lot of rapid-fire notes, especially on the Green, Red, and Yellow lanes. It's crucial to maintain your strumming speed and accuracy.
- 4Bridge 1: This bridge section will test your finger dexterity. You'll encounter some challenging note clusters, including sustained notes and quick hammer-ons/pull-offs indicated by the '*' symbol. Focus on hitting those sustained notes cleanly to build your multiplier.
- 5Pre-Chorus 1A: Get ready for a significant increase in note density. This section throws a lot at you, with rapid strumming and complex chord shapes. The '+' symbols indicate sustained notes or chords that require you to hold them down.
- 6Pre-Chorus 1B: Similar to the previous section, this pre-chorus demands high speed and precision. You'll be dealing with a barrage of notes across all five lanes. Stay calm and keep that strumming arm moving!
- Focus on maintaining your combo throughout these sections. Even a few missed notes can break your streak and lower your score significantly.
- Pay attention to the visual cues on screen. The game does a good job of indicating upcoming note patterns.
- Practice makes perfect! If you're struggling with a particular section, don't hesitate to replay it until you feel comfortable.
- Utilize your Star Power strategically. Activating it during dense note sections can give you a much-needed score boost.
Part 4
Navigate the complex fretboard patterns and master the song structures in Part 4 of our Guitar Hero World Tour guide. Learn the rhythms and hit every note!
Alright, we're diving into Part 4 of our Guitar Hero World Tour journey! This section is all about really digging into the song's structure and hitting those notes with precision. It might look a little overwhelming at first, especially with those quick bursts of notes, but trust me, it's all about recognizing the patterns and keeping your fingers ready.
- 1Pre-Chorus 1B: You'll start with a pretty standard strumming pattern on the Green and Red lanes, but keep an eye out for those quick Green notes marked with a '+'. They're fast, so be ready to switch lanes.
- 2Chorus 1A: This is where things pick up! You'll see a lot of sustained notes on the Yellow and Orange lanes, often marked with '+'. Don't get caught off guard by the rapid-fire Green and Red notes that pop up in between. It's a mix of holding and quick strums.
- 3Chorus 1B: Similar to the first chorus, but with some tricky Green and Red notes interspersed. The Yellow and Orange lanes will still be busy, but focus on hitting those quick Green and Red notes accurately.
- 4Interlude 1A: Things slow down a bit here, giving you a chance to breathe. You'll have some sustained notes on the Yellow and Orange lanes, but also some quick single notes on Green and Blue. Pay attention to the timing on those single notes.
- 5Interlude 1B: This part is a bit more intricate. You'll see a mix of sustained notes and quick single notes across all lanes. The key here is to stay focused and react quickly to the changing patterns.
- 6Verse 2A: We're back to a more structured pattern. You'll see a lot of sustained notes on the Yellow and Orange lanes, with some quick Green and Red notes mixed in. It's a good section to get into a solid rhythm.
- 7Verse 2B: This verse introduces some more complex strumming patterns, especially on the Green and Red lanes. You'll also see some sustained notes on Yellow and Orange. Try to anticipate the quick bursts of notes.
- 8Bridge 2: This is a challenging section with rapid-fire notes across multiple lanes. You'll need to be quick with your strumming hand and your fretting fingers to hit all of these accurately. Focus on the rhythm and don't miss those sustained notes.
- Don't be afraid to use Hammer-ons and Pull-offs (HOPOs) during the sustained note sections to save your strumming hand.
- Listen to the song! The music itself is your best guide for timing and rhythm.
- If you're struggling with a specific section, try slowing down the song in practice mode to nail the pattern before attempting it at full speed.
- Keep your eyes on the note highway, but also be aware of the upcoming note patterns to prepare your fingers.
Similar guides you might like


100% Human-Written. AI Fact-Checked. Community Verified. Learn how AntMag verifies content