Welcome to Final Fantasy IV, a classic 2D RPG where you play as Cecil, a dark knight grappling with his past as he leads his companions to stop a world-ending threat. You'll journey through iconic locations like Baron Castle and challenging caves, mastering character abilities and strategies to overcome formidable foes. It's a story-rich adventure perfect for anyone looking for a deep, engaging role-playing experience.
This guide is your companion through Cecil's journey and beyond. We'll help you navigate the prologue, strategize for tough boss fights, and optimize your party's growth with efficient leveling and weapon tactics. Whether you're aiming to save the world or simply master its intricacies, we've got you covered.
X # Monster Lv HP EXP Gil Weakness Steal
Get the lowdown on every enemy in Final Fantasy IV Pixel Remaster! Learn their levels, HP, EXP, Gil drops, weaknesses, and what they steal to prepare for battle.
Alright, so you're heading out into the world of Final Fantasy IV, and you're gonna start running into all sorts of critters. Some of them might look a little weak, but don't let that fool you! Especially around Baron, these early enemies can pack a surprising punch. Take the Helldiver, for instance – that Beak attack can stone you in an instant, and if you run into a group of four, they can really lay into you and Cecil. Always keep your guard up!
Here's a quick rundown of some of the early monsters you'll encounter:
| Monster | Lv | HP | EXP | Gil | Weakness | Steal |
| Floating Eye | 11 | 40 | 150 | 7 | Fire, Wind | Eye Drops |
| Goblin | 10 | 30 | 90 | 5 | None | Potion |
| Sword Rat | 10 | 31 | 93 | 5 | None | Potion |
| Helldiver | 10 | 28 | 56 | 4 | Wind | Phoenix Down |
You'll be making your way through the Mist Cave soon, which is located northwest of Baron. Just head past the bridge and into the cave. You'll want to be around level 10-12 for this area. Inside, you'll be looking for Potions, Eye Drops, and a Tent.
X # Monster Lv HP EXP Gil Weakness Steal (2)
Guide yourself through the Mist Cave in Final Fantasy IV Pixel Remaster! Learn enemy weaknesses, boss strategies for the Mist Dragon, and find key items.
Alright, let's get you through the Mist Cave in Final Fantasy IV. It's not too long, but there are a couple of things to watch out for, especially that Mist Dragon boss. Oh, and pay attention to Namingway – he's got a little sidequest for you!
Namingway Sidequest: As soon as you step into the Mist Cave, you'll bump into Namingway, who's currently calling himself Mappingway. He'll hand you the Wayfarer's Map. Don't worry, it doesn't take up inventory space; it's just always there on the bottom screen, showing you a map of the area as you explore. If you manage to fill out the map completely (100%), you'll snag a special item later on.
Mist Cave Walkthrough: The path through the Mist Cave is pretty straightforward. You'll eventually come to a fork: some stairs going north and a bridge to the east. Head up the stairs first to grab a Potion, then cross the bridge. Once you're across, go up the next set of stairs and keep heading east to find some Eye Drops. Follow the path south, down both sets of stairs, then loop west a bit to find a Tent.
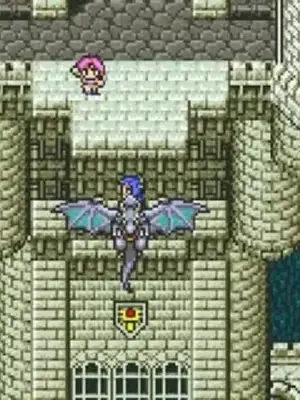
Now, backtrack to where you came down those two sets of steps. Head east between them and follow the path to grab another Potion. Get ready, because a boss fight is just around the corner. Make sure everyone's healed up, and then select "Yes" when prompted to fight the Mist Dragon.
| #154 - Mist Dragon | |||
| Level | 12 | Weakness | Dark |
| HP | 566 | ||
| EXP | 1112 | Resistance | Earth |
| Gil | 0 | ||
| Steal | None | Absorb | Holy |
| Drops | None |
This Mist Dragon is a bit tougher than you might remember from older versions. It has two main attacks: a physical hit and its Freezing Mist. The physical attack is no joke, but the Freezing Mist is the real danger – it can easily zap over 100 HP! The catch is, it only uses Freezing Mist as a counter-attack when you hit it while it's in its Mist form. So, here's the strategy:
- Start Strong: When the battle begins, have Kain use his Jump command and Cecil should use Darkness.
- Kain's Attack: Once Kain lands from his Jump, have him attack normally. You can try Jumps twice, but it can be risky if he lands on the Mist form.
- Mist Form Warning: Eventually, the Mist Dragon will transform into its Mist form. STOP ATTACKING IMMEDIATELY. Use this time to heal your party. If you attack it in Mist form, it *will* counter with that devastating Freezing Mist.
- Dragon Form Returns: Once it reverts to its Dragon form, have Kain Jump again and Cecil can reuse Darkness if it's worn off. Again, once Kain lands, have him attack normally.
It's a trickier fight now, but definitely manageable if you stick to the plan.
After you've beaten the Mist Dragon, head north to exit the cave. You'll find yourself in the town of Mist. As soon as you enter, a scene will play out, and you'll be thrown into a battle you can't win. Just fight as best you can, but don't waste any valuable healing items.
Important Note: Cecil's friend Kain will be leaving the party soon. Make sure to unequip him before you enter Mist, or you'll lose his gear!
When Cecil wakes up, Kain is gone, and a new girl is with him. Cecil will be fighting alone for a bit, so keep that in mind for any random battles you encounter.
X # Monster Lv HP EXP Gil Weakness Steal (3)
Get the full rundown on Final Fantasy IV's monsters, including their levels, HP, EXP, Gil, weaknesses, and stealable items. Prepare for battle!
Alright, so you're diving into Final Fantasy IV and want to know what you're up against? This section is your go-to for the nitty-gritty on the monsters you'll encounter. Knowing their stats and weaknesses can seriously save your hide, especially when you run into tougher foes.
We've got a list here that breaks down each monster, showing you their Level (Lv), Hit Points (HP), Experience Points (EXP) they drop, and the Gil you'll get for beating them. Plus, the really crucial stuff: their Weakness and what you can Steal from them (the number in parentheses tells you the chance of a successful steal, usually 3 out of X attempts).
Monster Data
| # | Monster | Lv | HP | EXP | Gil | Weakness | Steal (3) |
| 002 | Goblin | 10 | 30 | 90 | 5 | None | Potion |
| 003 | Sword Rat | 10 | 31 | 93 | 5 | None | Potion |
| 007 | Sand Worm | 12 | 500 | 1750 | 54 | Ice | Potion |
| 008 | Desert Sahagin | 12 | 40 | 100 | 6 | Ice | Antidote |
| 009 | Hundlegs | 12 | 46 | 115 | 7 | Ice | Potion |
| 010 | Tiny Mage | 13 | 50 | 224 | 16 | None | Rod |
Key Enemy Spotlight: Sand Worm
Now, pay attention to the Sand Worm. Seriously, this guy is no joke at Lv. 12. If you see one, your best bet is to just RUN. Use the R button to make a quick getaway. Trust me, the Sand Worm will absolutely crush you if you try to fight it at this stage of the game. Save your strength for when you're better equipped!
Underground Waterway Area
This section also touches on the Underground Waterway, a dungeon located due north of Kaipo. To find it, head straight north from Kaipo. When you reach the mountains, veer slightly east, and you'll spot the entrance nestled within them. The recommended level for tackling this area is between 12 and 15.
Item Checklist
- Potion
- Potion
- X-Potion
- Ether
- Ether
- Ether
- Dry Ether
- Maiden's Kiss
- Phoenix Down
- Bomb Fragment
- Zeus's Wrath
- Bronze Hourglass
- Hermes Sandals
- 580 Gil
Equipment Checklist
- Shadowblade
- Ice Rod
- Hades Helm
- Feathered Cap
- Hades Armor
- Hades Gloves
X # Monster Lv HP EXP Gil Weakness Steal (4)
Walkthrough for Final Fantasy IV's Waterway and Underground Lake areas, including enemy locations like Red Mousse and boss Octomammoth.
- 1At the Waterway Entrance, South - B1, head north to find a Potion and a Maiden's Kiss. Backtrack to the entrance, go west across the bridge, and south to find a Tent. Head north across the bridge and talk to the Old Man to recruit Sage Tellah.
- 2Tellah defaults to the back row; equip a Leather Cap on him if you have one.
- 3From Tellah's location, head north to the next floor. Alternatively, cross the bridge east, descend into the water, go up the waterfall for an Ether, then descend and head west to a wide waterfall. Enter the left side to find an X-Potion, a Dry Ether, and a Phoenix Down. Return to where you met Tellah and head north to the next floor.
- 4At Underground Waterway, South - B2, head north across the bridge, descend into the water, and go southwest up steps for a Potion. Continue south in the water, up steps, west, and into a door.
- 5Inside, you'll learn about Save Points (use the free Tent here). Exit the room, go east across the bridge, and north for an Ice Rod.
- 6Head south, descend into the water, go slightly east, and up into a door to the next floor.
- 7At Underground Waterway - B3, follow the path. At the split, go southeast for 580 Gil and a Bomb Fragment. Return to the split, go west, and enter the door.
- 8At Underground Waterway, North - B2, head north for a Potion. Continue north but stop south of the steps. Go west into the wall and follow the path to find a Feathered Cap. Backtrack and enter the next area.
- 9At Waterway Entrance, North - B1, head north and take west stairs up for an Ether and a Zeus's Wrath. Backtrack, cross the bridge, and head south to find the Shadowblade (equip on Cecil immediately). Enter the next area.
- 10You will reappear on the Overworld. Use a Tent and Save if needed. Proceed to the northern cavern.
- 11At Underground Falls, proceed downwards.
- 12At Underground Lake - B2, follow the path to steps going down. Pick up the Hades Helm and Hades Glove (equip on Cecil). Go back up and continue around into a door.
- 13At Underground Lake - B1, follow the path east to find the Hades Armor and Hermes' Sandals. Equip Cecil properly. Follow the path north and around towards the waterfall to face Octomammoth.
Enemies in this area:
- Tiny Mage (Lv 13, HP 50, EXP 224, Gil 16, Weakness: None, Steal: Rod)
- Red Mousse (Lv 16, HP 35, EXP 201, Gil 15, Weakness: Fire, Steal: Potion) - Has a 0.4% chance of dropping Rainbow Pudding.
- Zombie (Lv 14, HP 87, EXP 130, Gil 10, Weakness: Fire, Holy, Steal: Potion)
- Alligator (Lv 13, HP 175, EXP 438, Gil 20, Weakness: Ice, Steal: Leather Cap)
- Toadgre (Lv 14, HP 66, EXP 165, Gil 9, Weakness: Ice, Steal: Maiden's Kiss)
- Gigantoad (Lv 14, HP 94, EXP 235, Gil 12, Weakness: Ice, Steal: Maiden's Kiss)
- Sahagin (Lv 14, HP 110, EXP 275, Gil 14, Weakness: Thunder, Steal: Potion)
- Amoeba (Lv 14, HP 125, EXP 188, Gil 14, Weakness: Thunder, Steal: Antidote)
- Fangshell (Lv 15, HP 55, EXP 82, Gil 7, Weakness: Thunder, Steal: Diet Ration)
- Killer Fish (Lv 15, HP 60, EXP 90, Gil 8, Weakness: Thunder, Steal: Potion)
- Octomammoth (Lv 15, HP 3350, EXP 10050, Gil 1000, Weakness: Lightning, Dark, Steal: None, Absorb: Water, Holy)
- The Red Mousse has a 0.4% chance of dropping the rare Rainbow Pudding.
- Equip the Leather Cap on Tellah to boost his stats.
- The X-Potion, Dry Ether, and Phoenix Down found early are very rare; use them only in emergencies.
- Utilize the Save Point in the room after the first Save Point tutorial.
- Equip the Shadowblade on Cecil immediately upon finding it.
- Equip the Hades Helm, Hades Glove, Hades Armor, and Hermes' Sandals on Cecil before the Octomammoth battle.
- Octomammoth's only attack is physical, but it is fast. Use Darkness on Cecil and have him attack constantly.
- Recruitment of Sage Tellah.
- Items: Potion, Maiden's Kiss, Tent, Ether, X-Potion, Dry Ether, Phoenix Down, Ice Rod, Bomb Fragment, Feathered Cap, Zeus's Wrath, Shadowblade, Hades Helm, Hades Glove, Hades Armor, Hermes' Sandals.
- Experience and Gil from battles.
Similar guides you might like


100% Human-Written. AI Fact-Checked. Community Verified. Learn how AntMag verifies content