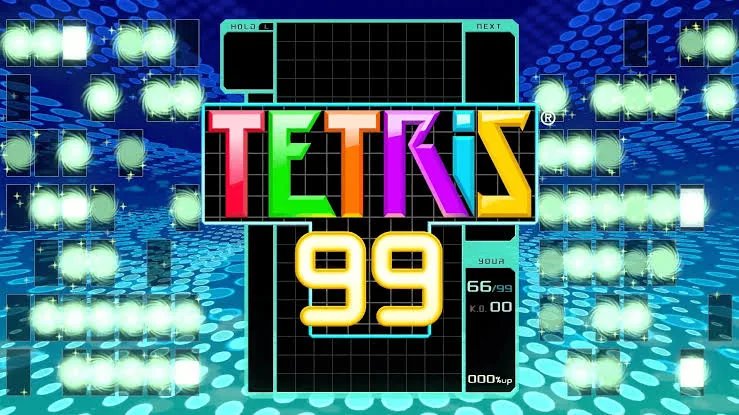
Welcome to Tetris 99, the ultimate battle royale twist on the classic puzzle game. You’ll be dropping tetrominoes and clearing lines against 98 other players, aiming to be the last one standing. It’s a frantic, fast-paced experience where mastering T-Spins, efficient stacking, and knowing when to attack are key to survival. This Nintendo Switch exclusive is perfect for anyone who loves Tetris and wants to test their skills in a competitive arena.
This guide dives deep into the strategies you'll need to achieve Tetris Maximus. We’ll cover everything from fundamental early-game tactics and refining your speed and precision to advanced aggressive play. Learn how to earn badges, outmaneuver opponents, and take down high-badge players to claim victory.
Part 1
Begin your Tetris 99 journey with Part 1 of our comprehensive guide. Learn essential strategies and tips to dominate the competition and achieve Tetris Maximus.
This section of the guide provides an overview of the Tetris 99 game and its associated systems. It details the various Tetris games available across different platforms, including Arcade, NES, SNES, N64, GameBoy, and PlayStation.
Supported Games and Systems:
- Arcade: Tetris Plus
- NES: Tetris (Nintendo), Tetris (Tengen), Tetris 2
- SNES: Tetris, Tetris 2, Tetris Attack
- N64: Magical Tetris Challenge, Tetrisphere, The New Tetris
- GameBoy & GBC: Tetris DX
- PlayStation: The Next Tetris, Tetris Plus
- Sega Saturn: Tetris Plus
Part 2
Dive deeper into Tetris 99! This guide breaks down the tricky 'L', 'J', 'S', 'Z', 'O', 'I', and 'T' pieces, explaining their movements and how to best utilize them.
Alright, welcome back! In Part 1, we covered the absolute basics of Tetris 99. Now, we're going to get into the nitty-gritty of the pieces themselves. Understanding how each shape behaves is key to improving your game, so let's break 'em down.
We're going to cover the seven standard Tetriminos. Think of this as getting to know your tools before you start building.
The Pieces
Each piece has its own personality, and some are definitely trickier than others. Let's go through them:
- The 'L' Piece: This one can be a real pain! That little extra bit sticking out from the side makes it tough to fit into tight spots, especially when the adjacent sides don't offer a good landing. It's the mirror image of the 'J' piece.
- The 'J' Piece: Just like the 'L', the 'J' piece is another common source of frustration. Its awkward shape means you often can't just slot it in anywhere. It's the opposite of the 'L' piece.
- The 'S' Piece: This piece, along with its counterpart the 'Z', is notorious for annoying players. A common strategy for these is to 'tower' them up, meaning you stack them vertically. We'll get into 'Tetrimonology' later, but for now, just know they're best stacked. It's the opposite of the 'Z' piece.
- The 'Z' Piece: Another piece that tends to get under players' skin. Like the 'S' piece, 'towering' them is often the best approach. It's the opposite of the 'S' piece.
- The 'O' Piece: This is the square piece. Honestly, it's pretty straightforward and most players don't complain about it. You'll only really struggle with it when all the available spots are jagged and don't offer a clean place to put it down.
- The 'I' Piece: Ah, the straight piece! This is the only piece that can clear four lines (a 'Tetris') in a single move. It's also the piece you'll find yourself wishing you had at the most inconvenient times. Generally, try to use it along the side walls or anywhere you can set up a Tetris clear.
- The 'T' Piece: This is arguably the most versatile piece in the game. It can fit into so many different situations. It's particularly useful for manipulating stacks of 'Z' or 'S' pieces, helping to set up clears or fix awkward gaps.
Piece Movement and Behavior
Understanding how these pieces rotate and move is crucial. Here’s a look at their basic clockwise movements:
| PIECE | MOVEMENTS (CLOCKWISE) | |||
| _ |_| |_|_ |_|_| | _ |_| |_|_ |_|_| | _ _ _ |_|_|_| |_| | _ _ |_|_| |_| |_| | _ |_|_ _ |_|_|_| |
| _ |_| _|_| |_|_| | _ |_| |_|_ _ |_|_|_| | _ _ _ |_|_|_| |_| | _ _ |_|_| |_| |_| | _ _ _ |_|_|_| |
| _ |_|_ |_|_| |_| | _ |_|_ |_|_| |_| | _ _ |_|_| |_|_| |_| | _ _ |_|_| |_|_| |_| | _ _ |_|_| |_|_| |_| |
| _ |_|_ _|_|_| |_|_|_| | _ |_|_ |_|_| |_| | _ _ |_|_| |_|_| |_| | _ _ |_|_| |_|_| |_| | _ _ |_|_| |_|_| |_| |
Keep these shapes and their movements in mind as you play. The better you know them, the faster you'll be able to react and place them effectively. Next up, we'll talk about some more advanced strategies!
Part 3
Discover how Tetris 99 pieces combine to form powerful lines and clear the board. Learn the best partnerships for maximum points and survival.
This section dives into how the different Tetris pieces in Tetris 99 can be combined to create more effective line clears and score big. Understanding these 'partnerships' is key to surviving longer and outlasting your opponents.
The Pieces and Their Partnerships:
Here's a breakdown of how specific pieces work best when paired together:
- I-Piece (Line Piece):
- When paired with two L-pieces (2xL), you can set up efficient clears.
- Combining two L-pieces with one S-piece (2xL + 1xS) offers another strong clearing opportunity.
- Four L-pieces (4xL) can create a very large clearing potential.
- J-Piece:
- Pairing two J-pieces with one Z-piece (2xJ + 1xZ) is a solid combination.
- Four J-pieces (4xJ) can also be used for significant clearing.
- L-Piece:
- A combination of two L-pieces and one S-piece (2xL + 1xS) is effective.
- J-Piece:
- A combination of two J-pieces and one Z-piece (2xJ + 1xZ) is effective.
- Square Piece (O-Piece): This piece is incredibly versatile and can fit almost anywhere, often providing a significant advantage regardless of what's around it.
- Always be on the lookout for opportunities to set up these combinations.
- The I-piece and the Square piece are particularly flexible and can be used to complete many different setups.
- Think ahead about how the next piece you receive could fit into your current stack to create a powerful clear.
Part 4
Learn advanced strategies for Tetris 99 Part 4, including organizing pieces into towers, effective use of T, Z, S, and I blocks, and risk-taking for higher scores.
This section of the guide focuses on advanced strategies for Tetris 99, emphasizing organization and risk-taking to maximize scores.
- 1Start by organizing game pieces into 'Towers' to gradually build up for Tetrises.
- 2If the first block is an 'I' block, place it vertically against the wall to avoid unnecessary space occupation and clear bottom layers for easy lines and Tetrises.
- 3Tower 'Z' and 'S' blocks on the sides or next to each other to reduce holes in your layers, as these are the hardest pieces to place.
- 4When you get your first 'T' piece, place its flat side on the bottom layer of the screen.
- 5Continue layering pieces, but try to avoid creating a 'Fish Net' (a grid-like pattern of holes).
- 6An easy way to achieve a Tetris is to leave a row on the side of the screen spare. When an 'I' piece appears, slot it into this space to complete a Tetris. Be aware that 'I' pieces may not appear frequently or at opportune times.
- 7Alternatively, focus on eliminating each line as it appears. This method is safer and leads to a steady increase in line count, though it is less exciting and may result in fewer Tetrises.
- 8Taking risks and playing on the edge can lead to higher scores in Tetris.
- 9Always utilize the Preview box to see what block is coming next, which aids in strategic piece placement.
- 10Train your mind to visualize how each piece looks when rotated and where it can fit.
- Organizing pieces into 'Towers' is a fundamental strategy.
- Vertical placement of 'I' blocks at the start is efficient.
- Stacking 'Z' and 'S' blocks together minimizes gaps.
- Placing the 'T' piece with its flat side down is recommended.
- Avoid creating a 'Fish Net' pattern.
- A dedicated side column for 'I' pieces can facilitate Tetrises, but relies on 'I' piece availability.
- Eliminating lines as they appear is a safe but less engaging strategy.
- Risk-taking generally leads to higher scores.
- Constant attention to the Preview box is crucial for planning.
- Developing spatial reasoning for rotated pieces is essential.
Similar guides you might like


100% Human-Written. AI Fact-Checked. Community Verified. Learn how AntMag verifies content