Learn about the story and initial gameplay of Castlevania: Belmont's Revenge. Discover how Christopher Belmont begins his quest to save his son Soleiyu and defeat Count Dracula.
Fangs for the memories...
In the first Castlevania Adventure, the fearless vampire hunter Christopher Belmont fought toe-to-toe and whip-to-wing against the vampire king, Count Dracula. Belmont defeated the Count and destroyed his castle, but unfortunately Dracula used what remained of his magical powers to transform his body into mist, thereby making good his escape.
However, his powers were so depleted that he was left unable to transform into human form. The count decided to wait and rebuild his dark forces. Deep inside his black heart he swore revenge on Christopher Belmont and his family.
Fifteen years later, a ceremony was held in the town of Transylvania. The son of Christopher Belmont, Soleiyu Belmont, had come of age, and it was time for the title of vampire hunter to be passed down to him. The ceremony was used to commemorate this occasion. All the citizens of Transylvania rejoiced, hoping that the father-son team of vampire hunters would bring peace to the region forever.
But on the morning after the ceremony, it was discovered that Soleiyu Belmont had vanished into thin air. The ceremony was the chance Dracula had waited for. Soleiyu received great sacred power in the ceremony to mark his adulthood, and Dracula used his last bit of magic to turn Soleiyu's powers against him, transforming him into a terrible demon. Then, aided by the Soleiyu-demon, Dracula was able to assume human form once again. That evening, to the northeast of the village, the earth shook with a thunderous roar and four ominous castles appeared. And, hidden in a lake at the center of these castles, was another castle, the new lair of Count Dracula!
Horrified to learn that his son had been altered by the forces of evil, Christopher Belmont determined to save Soleiyu and break the ambitions of the Count. He journeyed to the new castles, each ruled by a different power of darkness placed there by the Soleiyu-demon to stop anyone who would tamper with the mystic spell Dracula had cast upon him. Nevertheless, in order to save the village of Transylvania and free his son, Christopher had no choice but to go and fight once again.
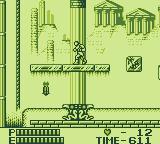
Crystal Castle
Ok, let's do this! Not bad music here. Start heading to the right (obviously the water will move you) and hit the first candle for a power-up. You'll see an eagle up ahead who will try to swoop at you and will continue swooping until you kill it. Head to the end and get the bottom candle for the AXE sub-weapon. In the next screen hit the first candle for another power up. There is a bat coming up, so kill it before it starts to annoy you and climb up the rope. The candle here is HOLY WATER if you want it. Kill the knight and continue to the door.
The candle underneath you has a single heart (not worth it) so continue to the left. Kill the knight before jumping onto his platform and continue above the water. As you go on, mermen will appear (as shadows) down below and jump up, so kill them as they land. If you're too slow they will start to come from the right too, so continue to the breaking block and head up.
Up here is a Punaguchi (I learned their name from Castlevania: The Adventure) who shoots balls of energy at you. Whip the balls to destroy them and then kill the Puna (my abbreviation for this enemy) and head through the door. Be VERY careful not to get hit, as the Puna can DECREASE your whips level!!! In this room eyeballs will fall from above and roll to the left. Use the ropes here to avoid them (or just destroy them, but be careful) and head down. In the next room the right wall will close in on you so hold jump and down to slide down to the next screen.
This screen has another moving spike wall. Time your slide down and you'll be ok. On the next screen is ANOTHER spike wall. The first oppurtunity to jump to the left is a good one, but you'll need to kill a knight (not hard). Keep on heading down and using the cubbys on the left to avoid the wall (the out of the way candle is only a heart). Head down to the next screen and destroy the eyeballs as they roll to the right to reach the next door.
In this next screen you'll see a rope that leads both UP and DOWN. You can take either way as they both lead to the same place (you'll just face different enemies in different routes). Here's both routes:
GOING DOWN
This path MAY be the harder one. The first screen down has an enemy that leaps around and throws knives, and its VERY hard not to get hit here. Past that is a Puna (kill it quickly) and a water section. Mermen actually inhabit all the water here, so proceed carefully and watch out for the blocks. Go up a screen to find some jellyfish on the ceiling. These things jump up and down the screen but are pretty slow (and stay still as you whip them). Past the jellyfish is a Puna guarding a door. Kill it and proceed through the door. THIS is the room that you'll get to if you went the UP path back at the choice by the way.
GOING UP
Kill the bats and keep heading up. There's a Puna up here but its a ways away, so focus on killing the balls it spits (you don't want to lose your whip level). Head to the left and start jumping quickly past the breakable blocks (I'd ignore the bats). You can get some HOLY WATER in one of the candles here. Go down the rope and kill the jellyfish, then kill the Puna guarding the door. THIS is the room that you'll get to if you went the DOWN path back at the choice by the way.
PATHS CONVERGE
Notice the change in music? Pretty cool! Gather what candles you can and head to the far left. Once the screen stops scrolling get ready for a boss fight. Whip the candle and pick up the orb to face:
- Boss: Darkside
This boss is pretty unique. You'll see a cl
100% Human-Written. AI Fact-Checked. Community Verified. Learn how AntMag verifies content